BWCE CI/CD 파이프라인 구성
[toc]
0. 환경 이해
BWCE의 CI/CD를 환경 구축을 위하여 본 블로그에서는 GitHub 와 Jenkins 환경을 이용하고자 합니다. 기타 다른 형상관리툴과 배포 툴을 이용하더라도 근본적으로 Maven을 지원하는 환경하에서는 유사한 패턴을 가지기 때문에 GitHub와 Jenkins 환경의 CI/CD 환경에 대한 이해를 그대로 적용 하실수 있습니다.
1. Jenkins 환경 구축
본 블로그에서는 구축되어 있는 Kubernetes환경 하에서 Jenkins 환경을 Container환경으로 구축합니다. BWCE의 CI/CD를 위해서는 Jenkins Container 내부에서 Docker Image를 Build 할수 있어야 합니다.
1.1 Jenkins Pod Resource 생성
jenkins_pod.yaml 파일을 생성합니다.
apiVersion: v1
kind: Pod
metadata:
  name: jenkins-docker
  labels:
    app: jenkins-docker
    deployment: jenkins-docker
spec:
  containers:
    - name: jenkins-docker
      image: jenkins/jenkins:lts
      ports:
        - containerPort: 8080
          protocol: TCP
        - containerPort: 50000
          protocol: TCP
      env:
        - name: TZ
          value:  "Asia/Seoul"
      imagePullPolicy: Always
      securityContext:
        runAsUser: 0
      volumeMounts:
      - name: docker-sock
        mountPath: /var/run/docker.sock
  volumes:
  - name: docker-sock
    hostPath:
      path: /var/run/docker.sock
  restartPolicy: Always
Jenkins Container가 생성되는 노드 호스트의 /var/run/docker.sock 를 Jenkins Container에 마운트 하여 Jenkins Container내부에서 Docker Image를 Build 할 수 있도록 합니다. /var/run/docker.sock 는 기본적으로 root 계정에서만 접근 가능하기 때문에 Jenkins Container의 계정을 runAsUser: 0 을 통해 root 계정으로 실행하도록 합니다. (또는 노드 호스트의 /var/run/docker.sock의 퍼미션을 666으로 변경하여 다른 계정에서 접근 하도록 변경하여도 됩니다.)
Jenkins Pod를 생성합니다.
$ kubectl create -f  jenkins_pod.yaml
pod/jenkins-docker created
1.2. Jenkins Service Resource 생성
jenkins_service.yaml 파일을 생성합니다.
apiVersion: v1
kind: Service
metadata:
  name: jenkins-docker-service
spec:
  type: NodePort
  selector:
    deployment: jenkins-docker
  ports:
  - port: 8080
    protocol: TCP
    targetPort: 8080
    nodePort: 32088
nodePort 는 32088로 설정하였으며, 해당 port로 웹 접근 가능합니다.
Jenkins Service를 생성합니다.
$ kubectl create -f  jenkins_pod.yam
service/jenkins-docker-service created
1.3. Jenkins 접속 및 초기화
URL : http://{Worker-node-IP}:32088/ 로 접속
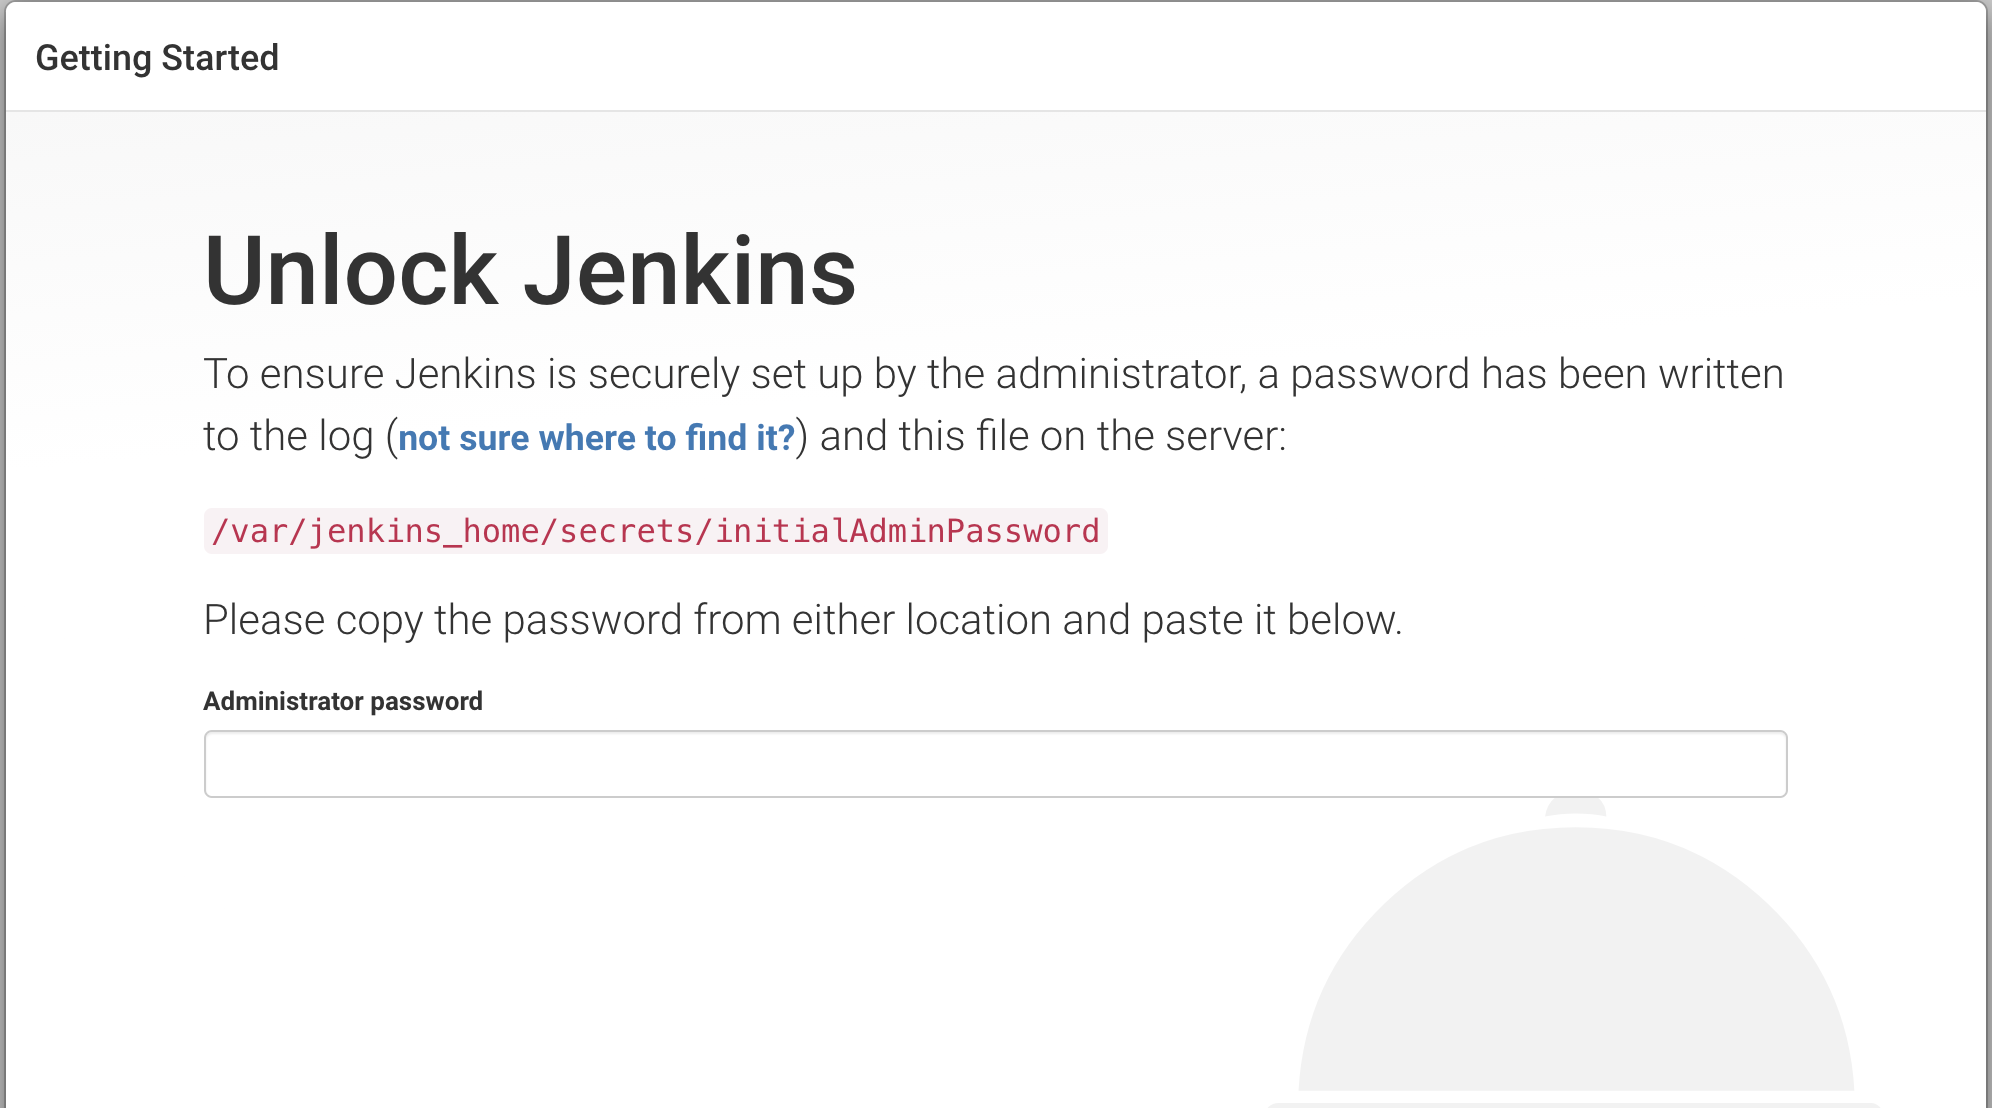
Jenkins Pod에 cat /var/jenkins_home/secrets/initialAdminPassword 명령어를 전달하여 Admin Password 얻기
$ kubectl exec -it  jenkins-docker cat /var/jenkins_home/secrets/initialAdminPassword
363bba765abb43b0aa5651279973dafc
기본 추천 plugin 셋 설치하기
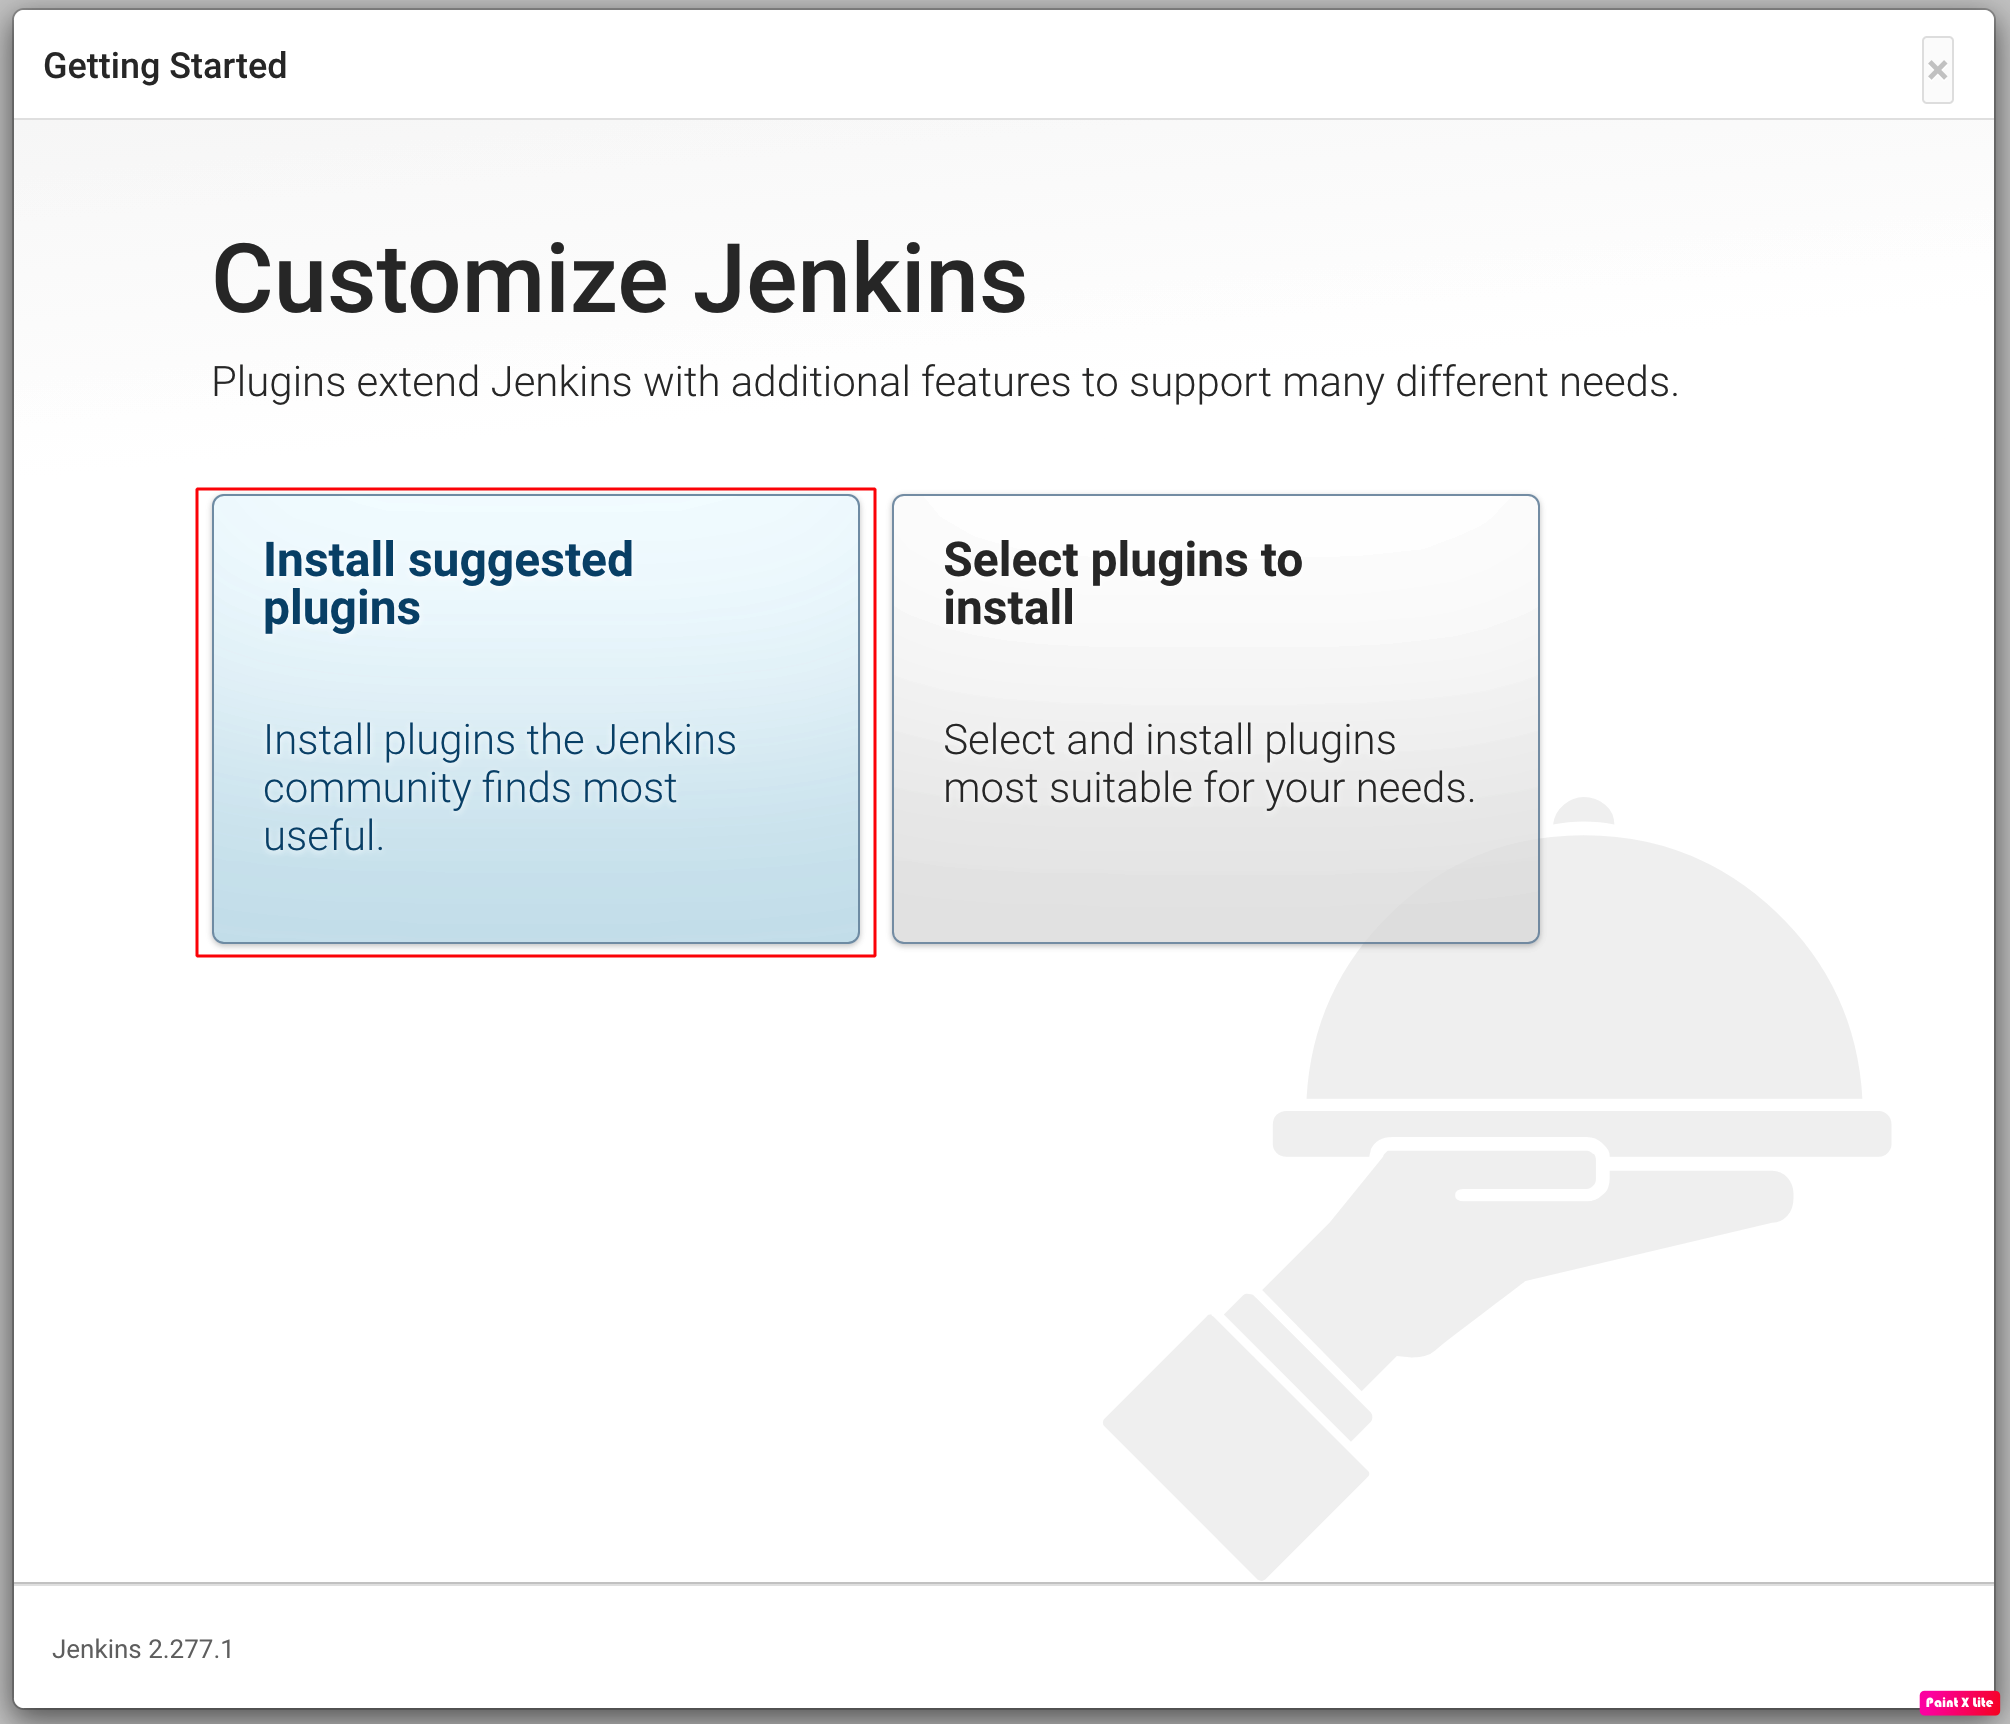
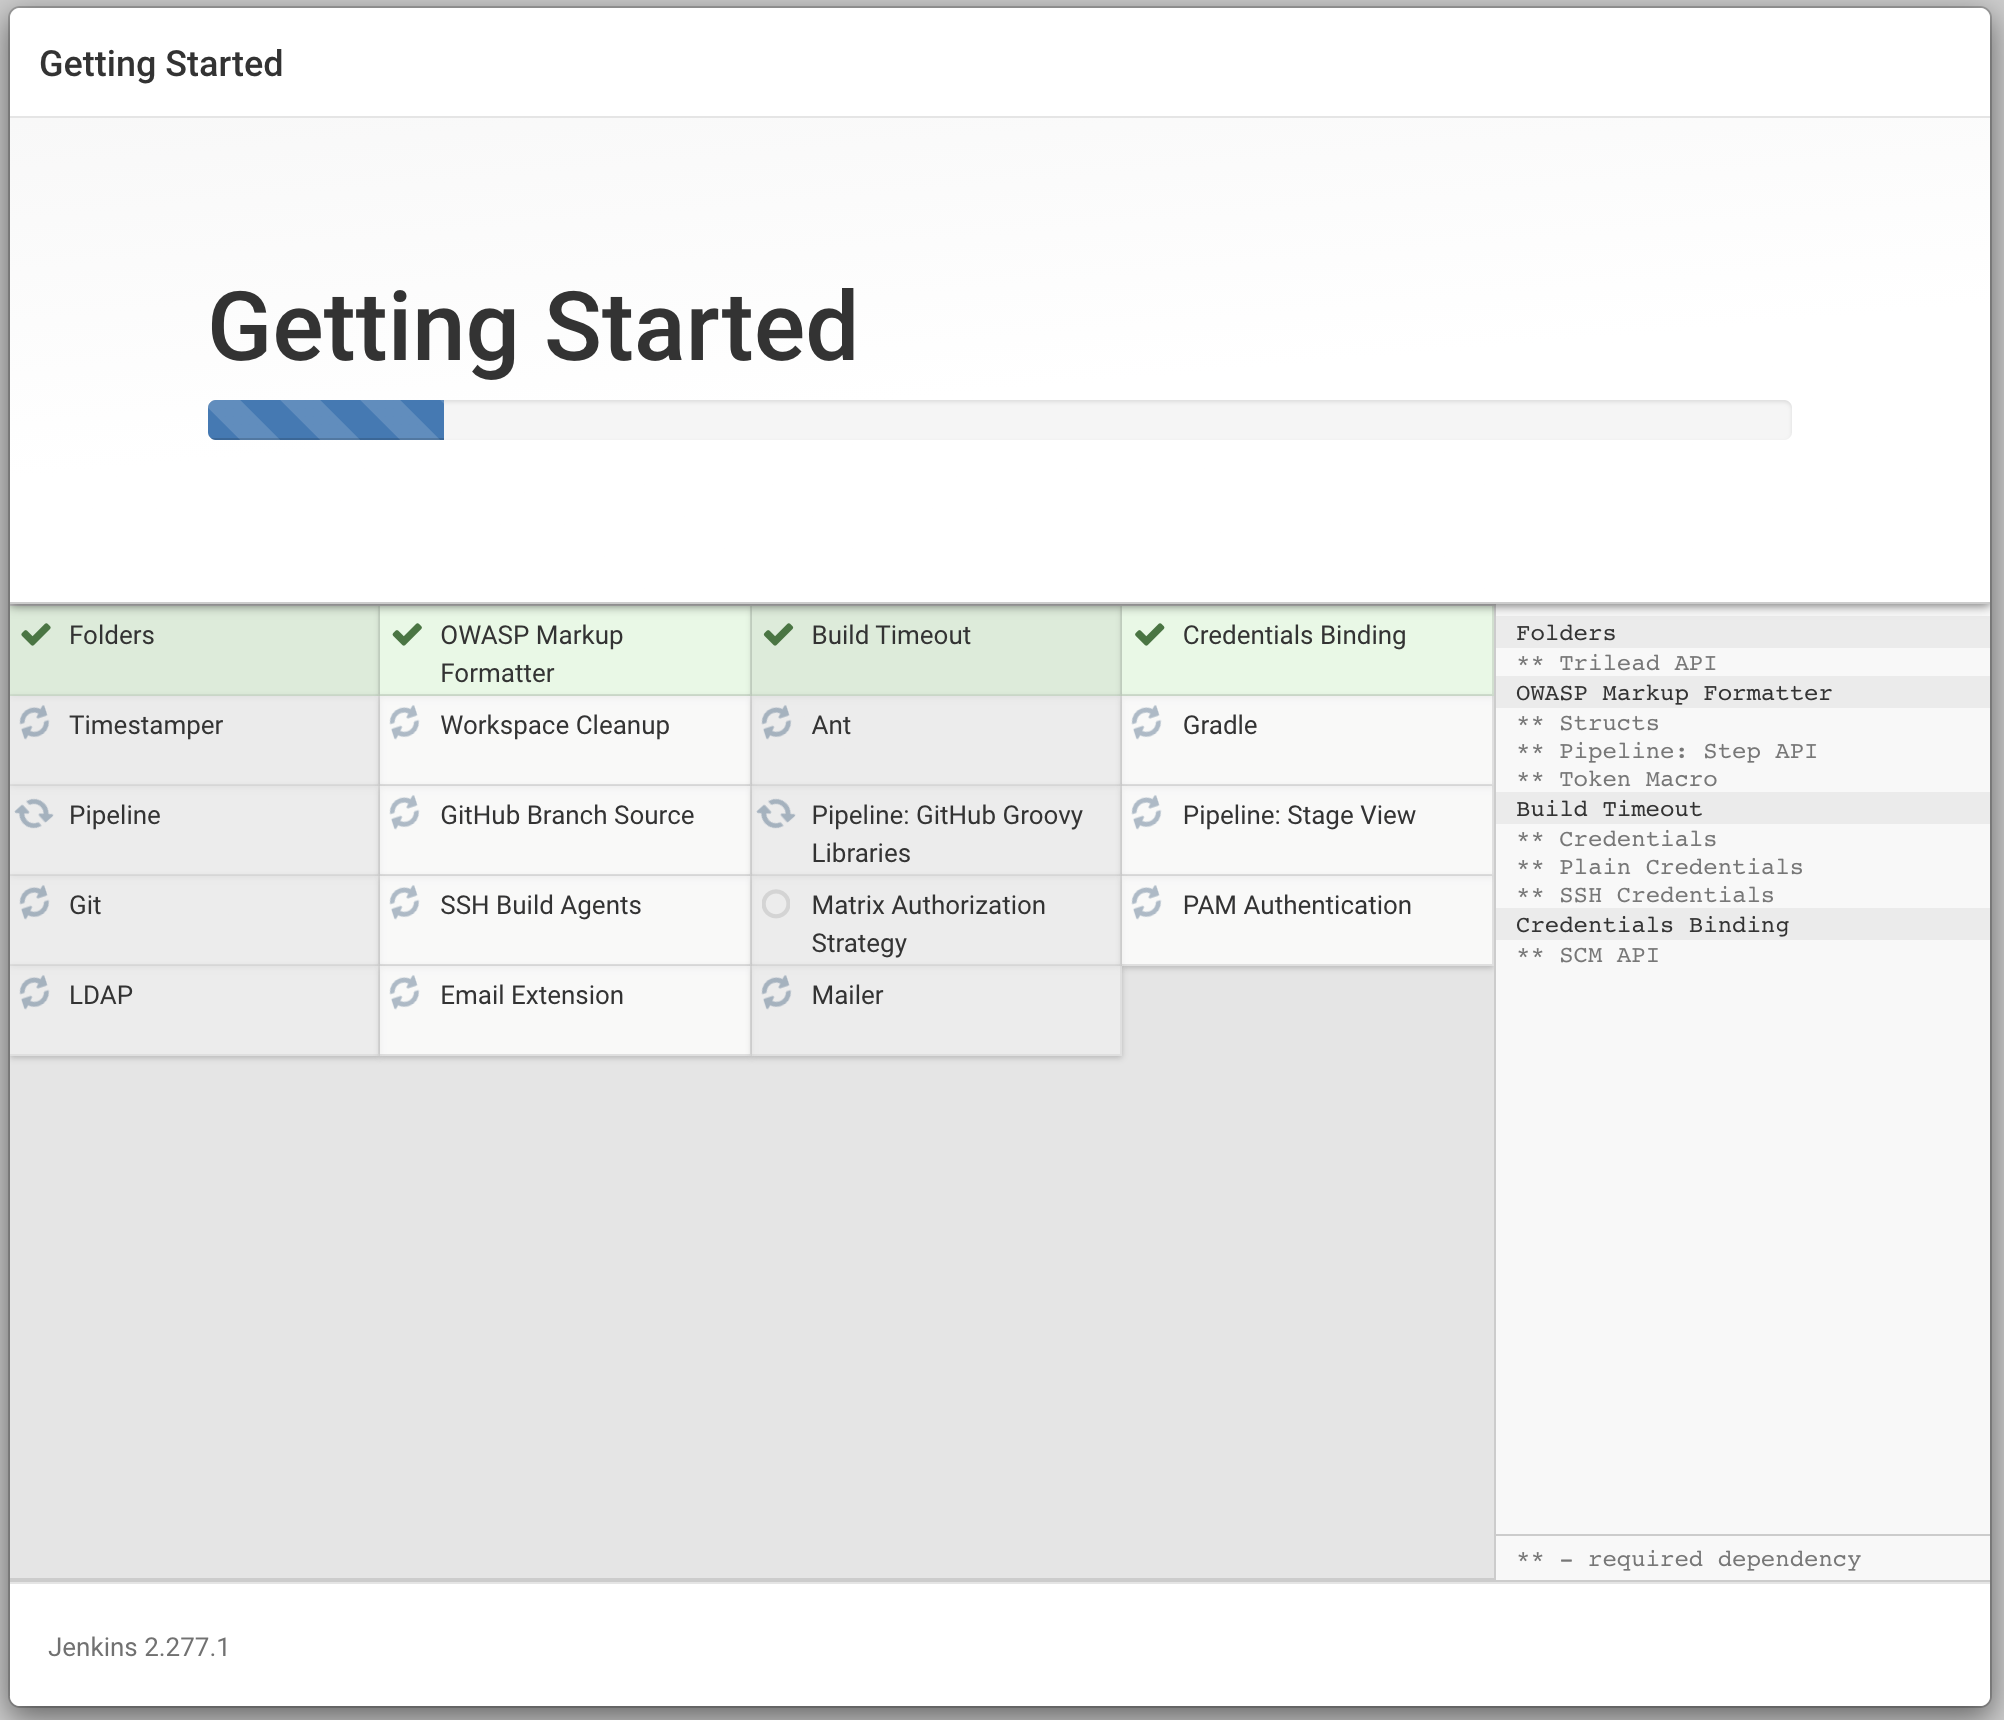
기본 사용자 추가
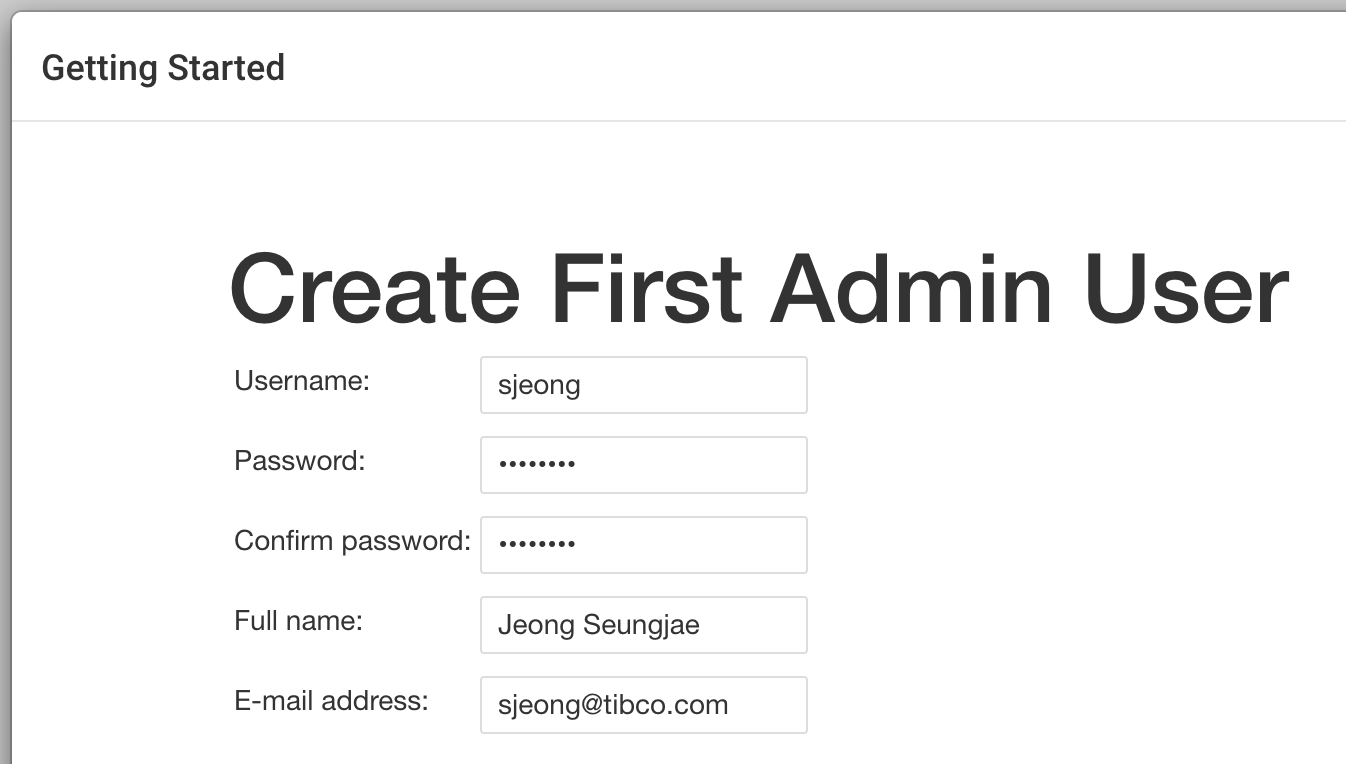
1.4. Jenkins 에 Maven 설정
Dashboard -> Manage Jenkins -> Global Tool Configuration 항목 들어가기 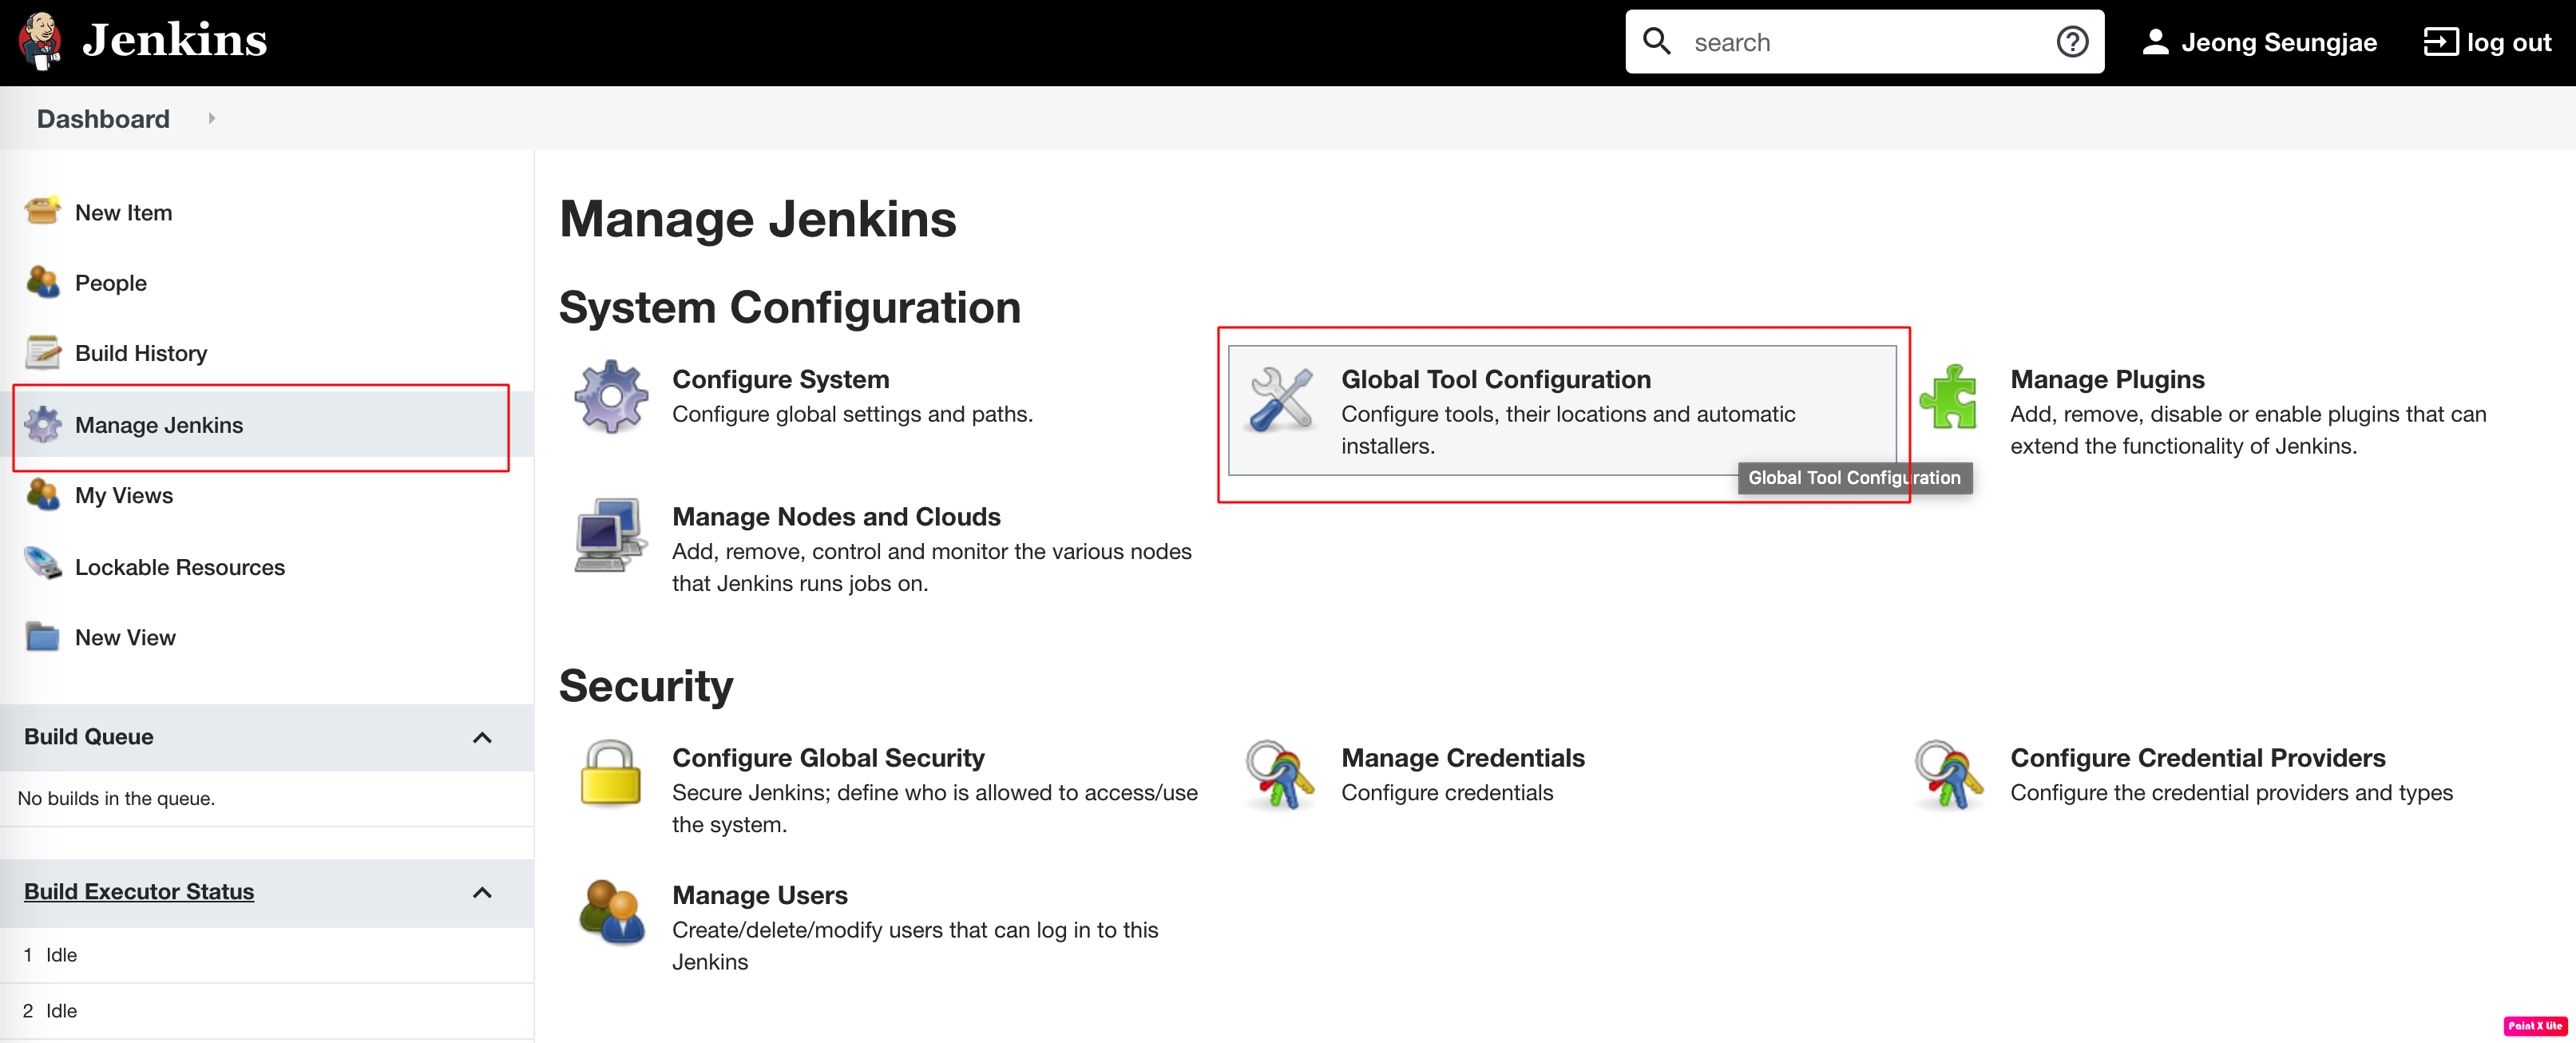
Maven 항목에서 Maven 최신 버전을 자동 설치 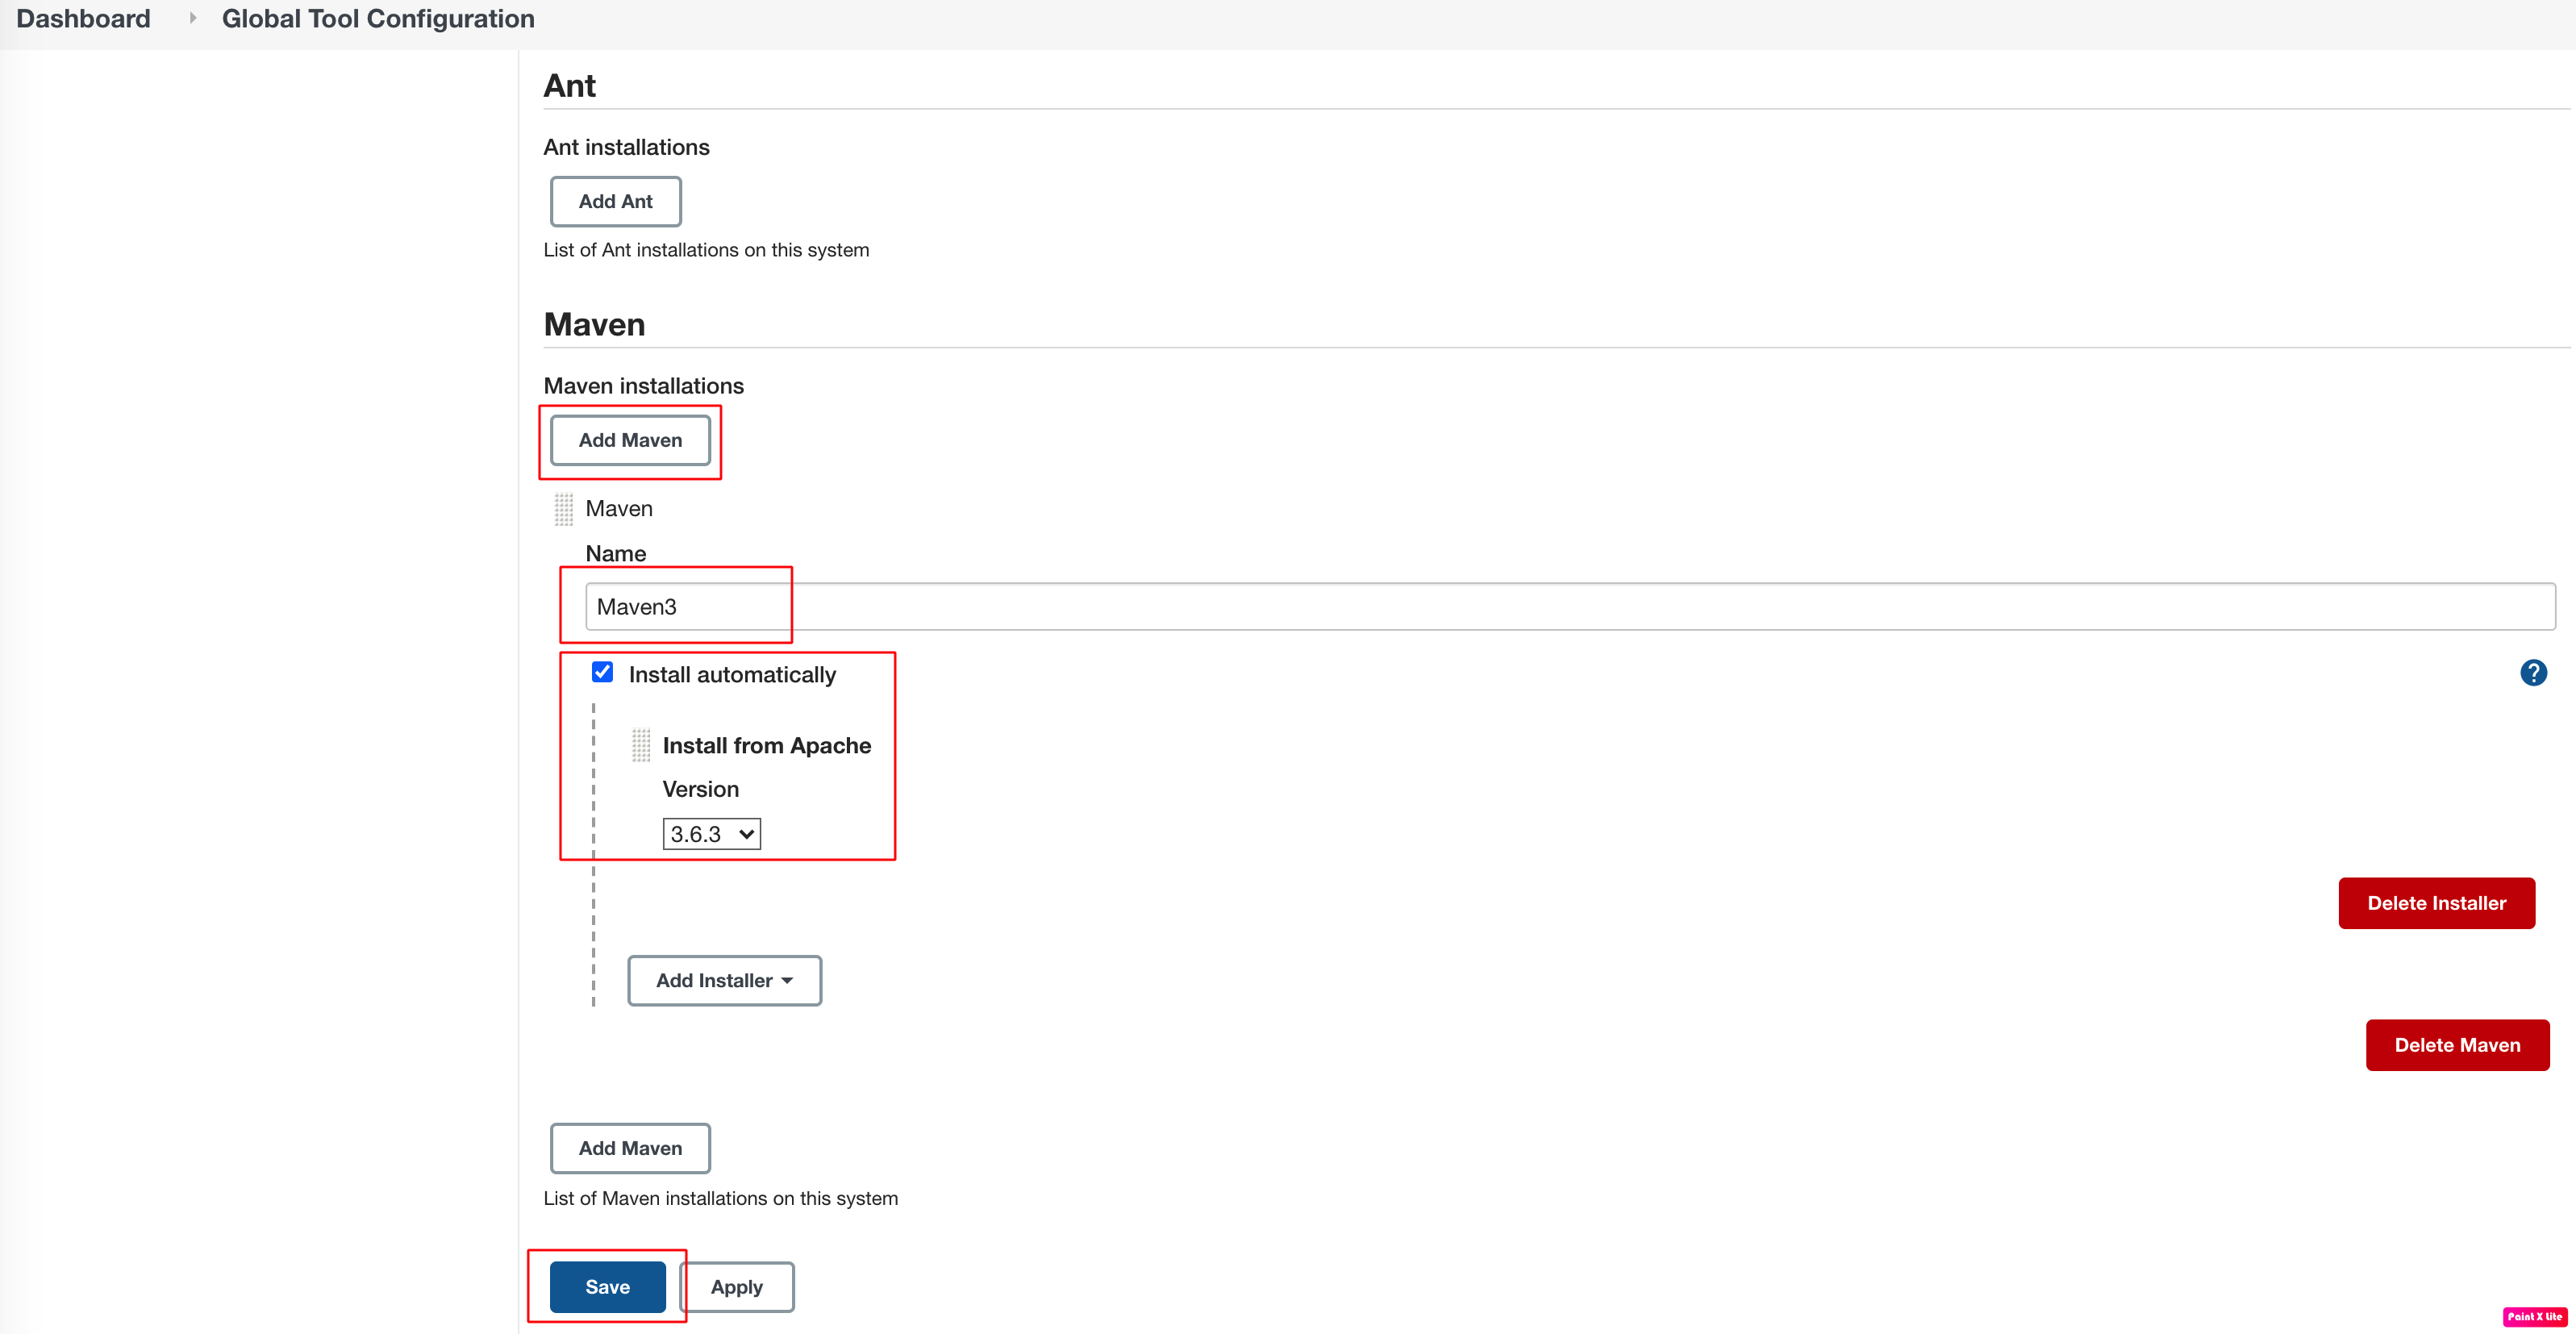
Maven Name은 버젼별로 Jenkins Job 혹은 pipeline에서 호출될 이름입니다. 블로그에서는 Maven3로 명명 하였습니다.
1.5. Jenkins Blue Ocean plugin 설정
Dashboard -> Manage Jenkins -> Manage Plugins 항목 들어가기 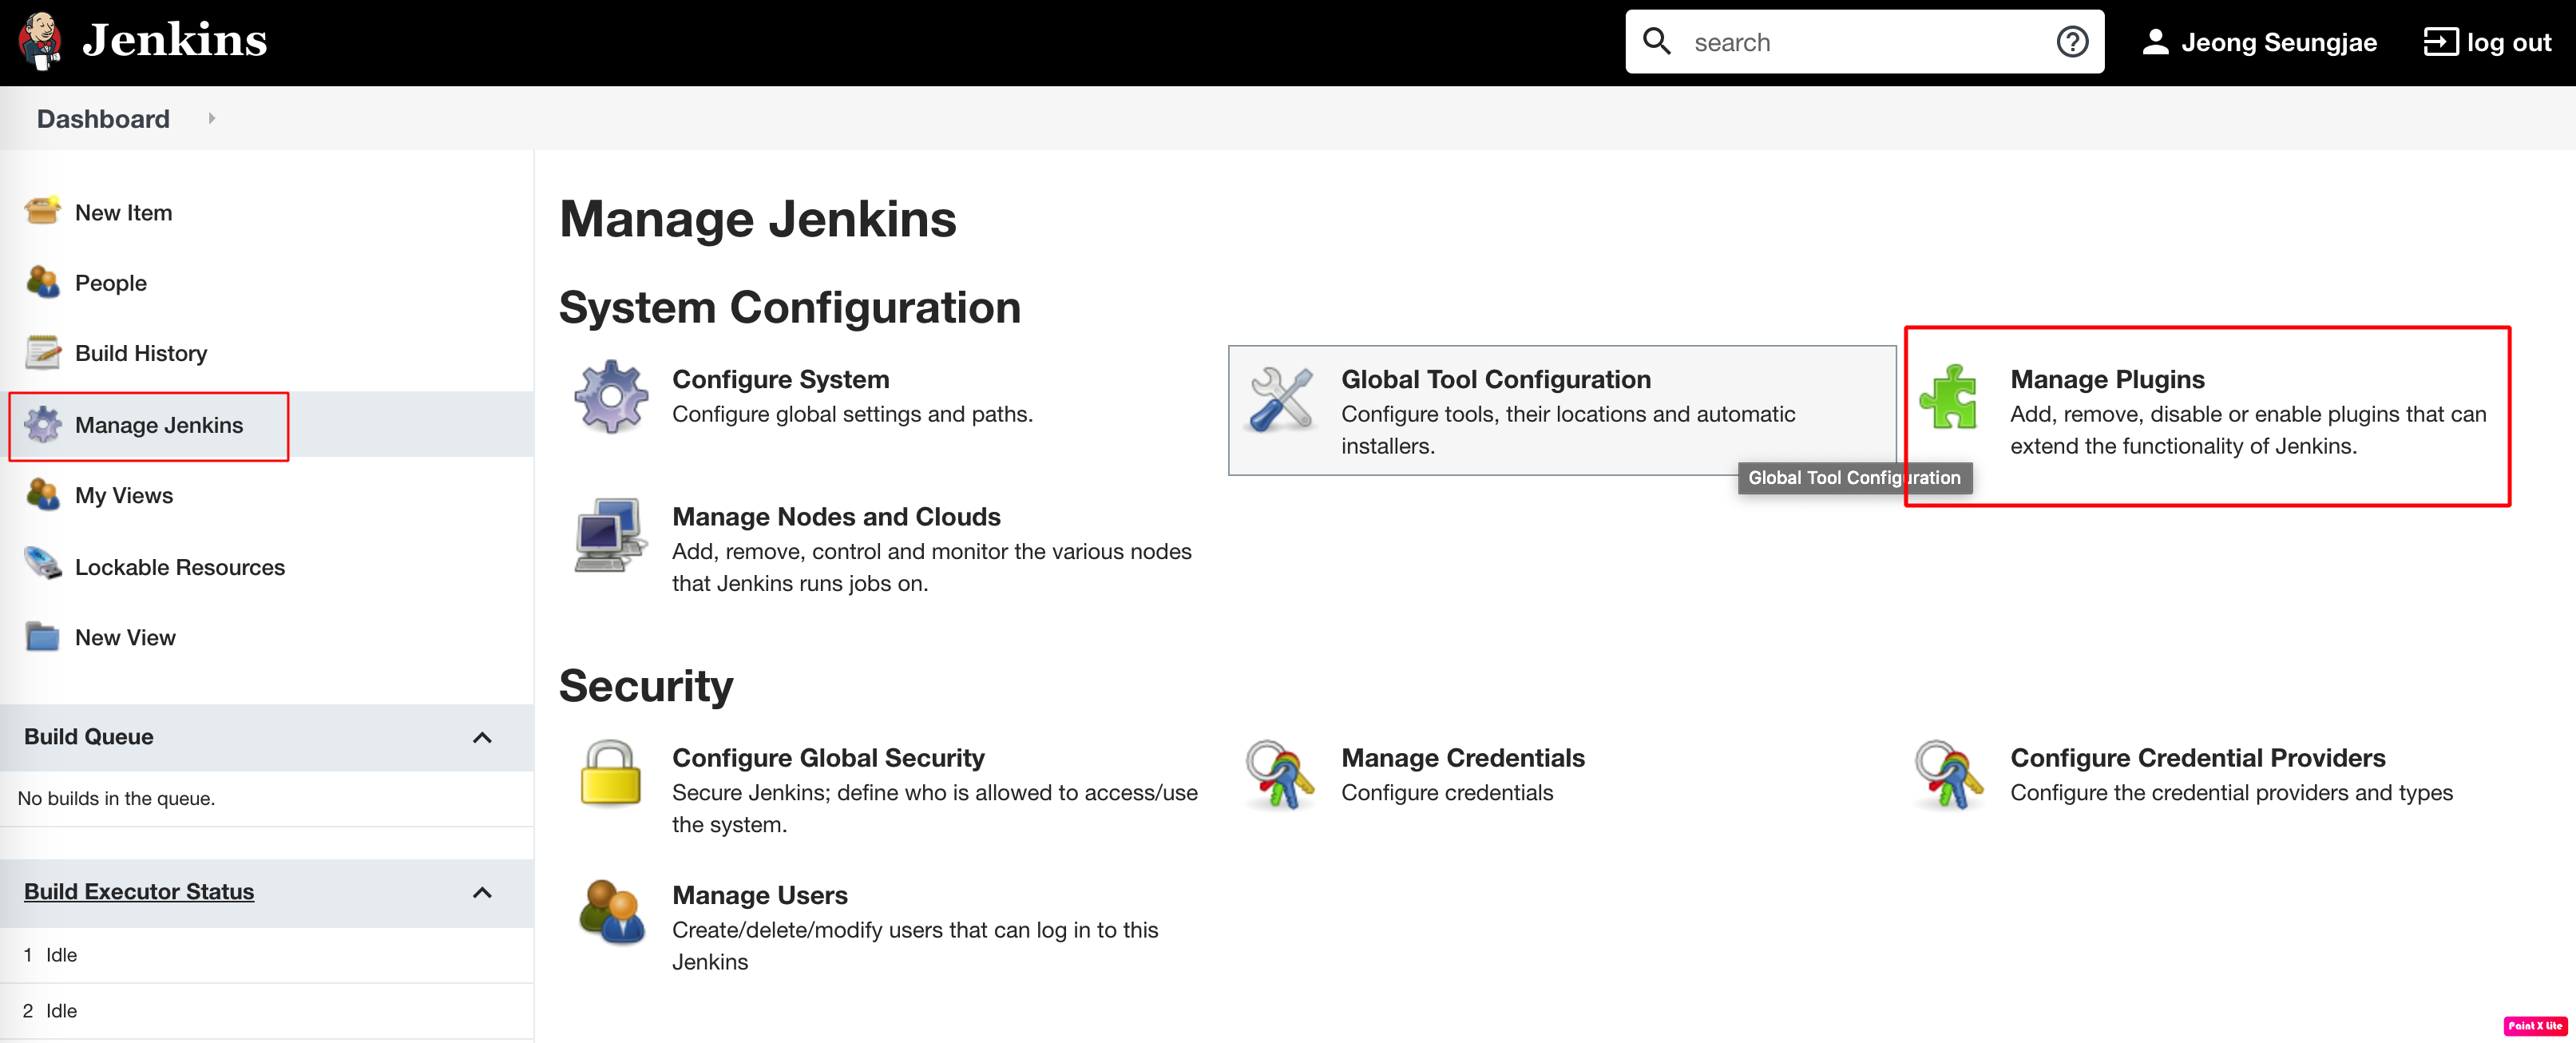
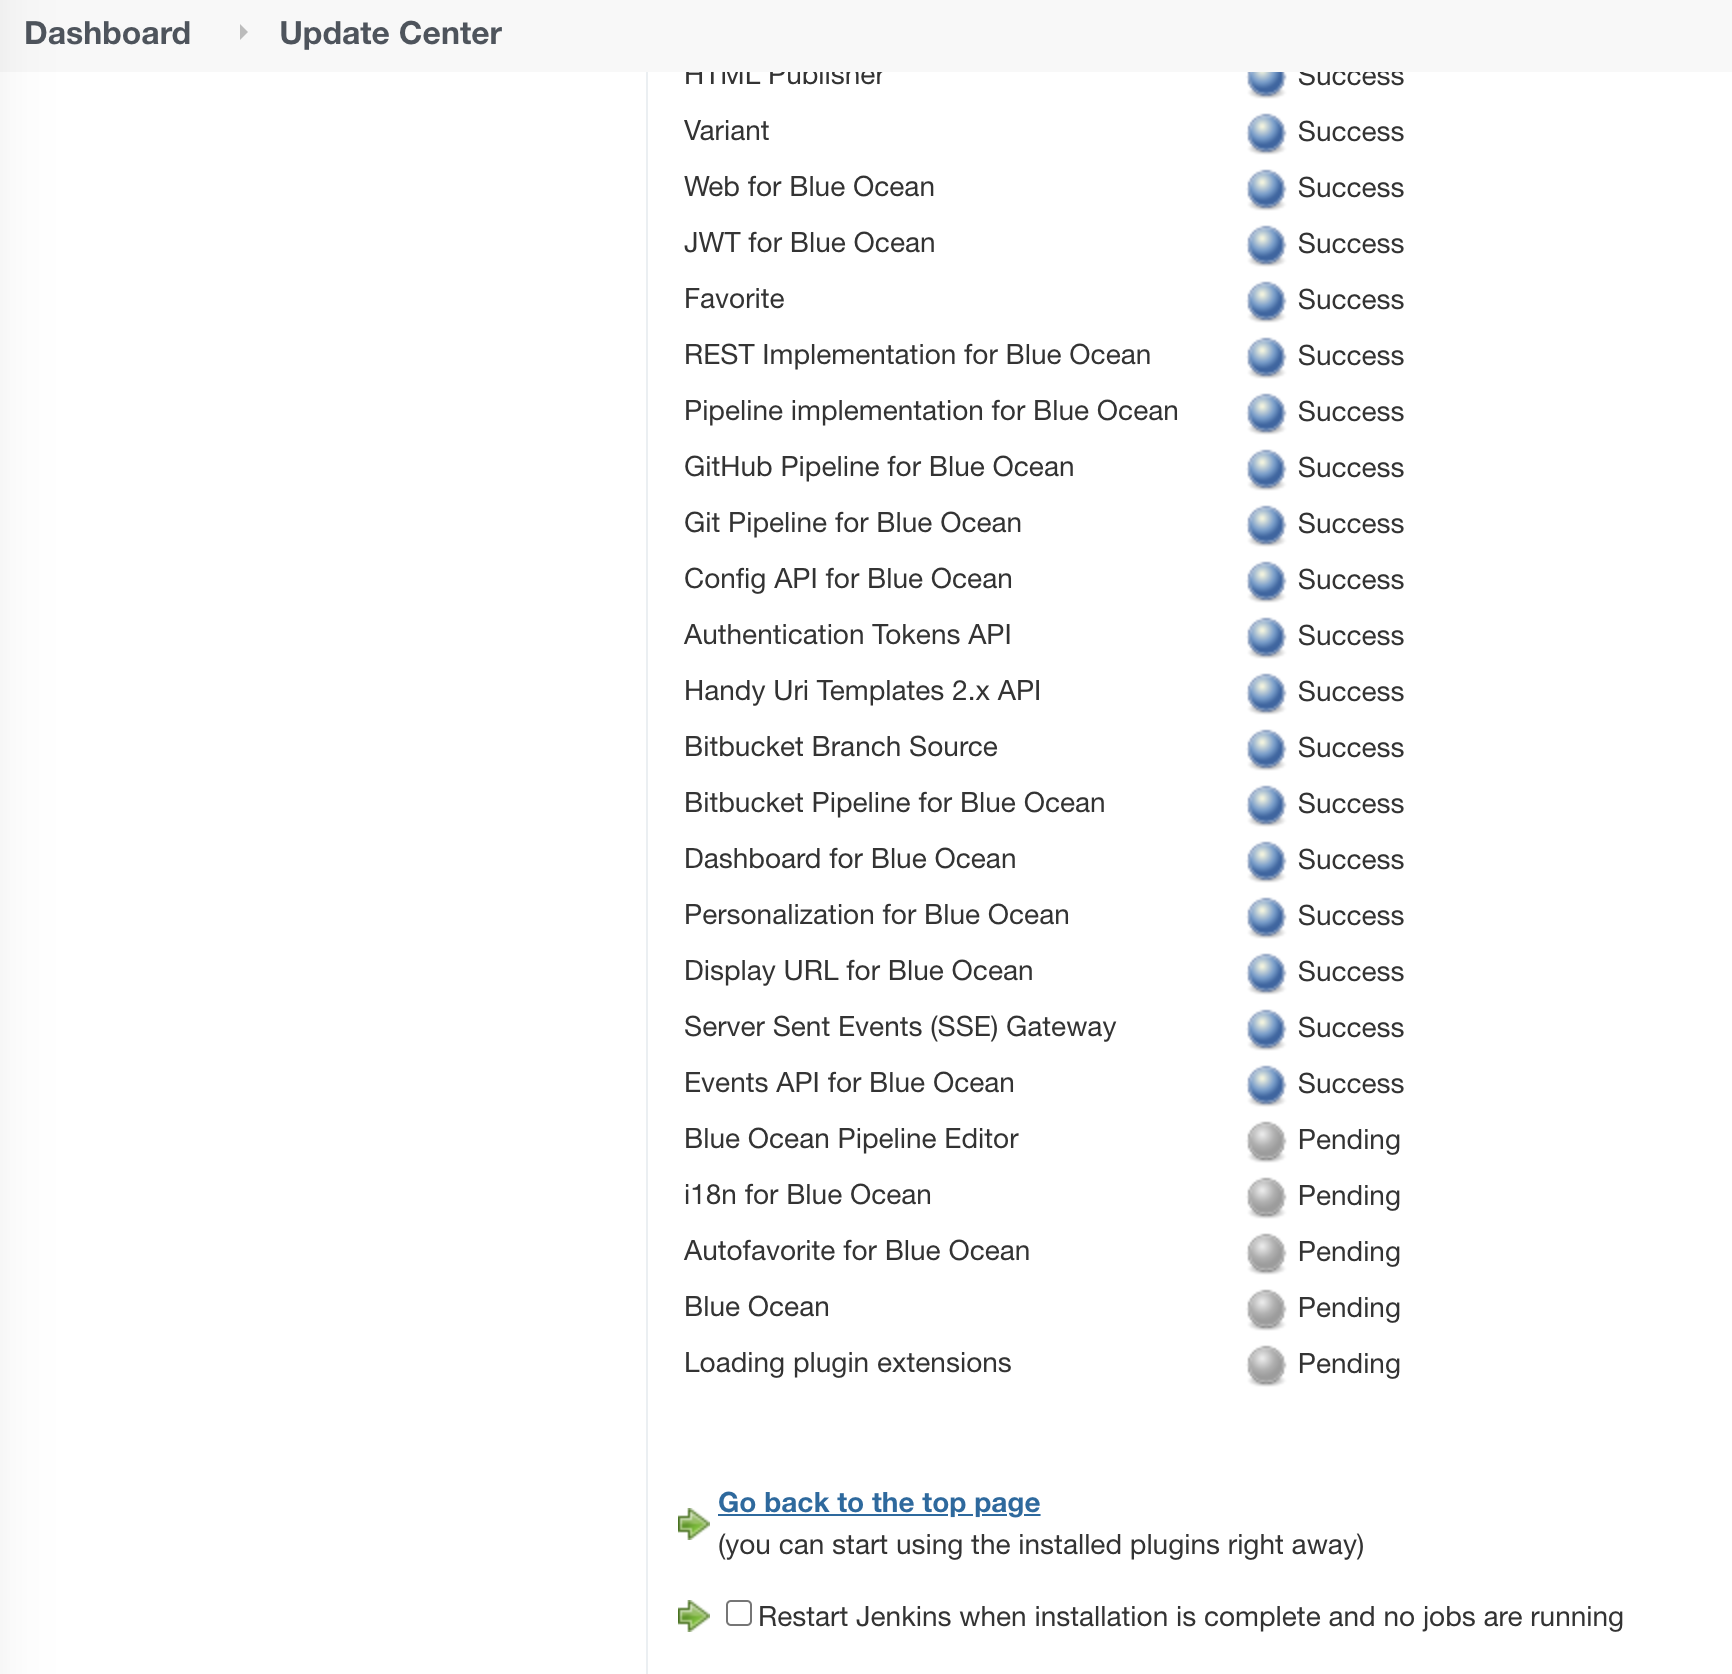
Available 항목에서 Blue Ocean 검색 및 설치 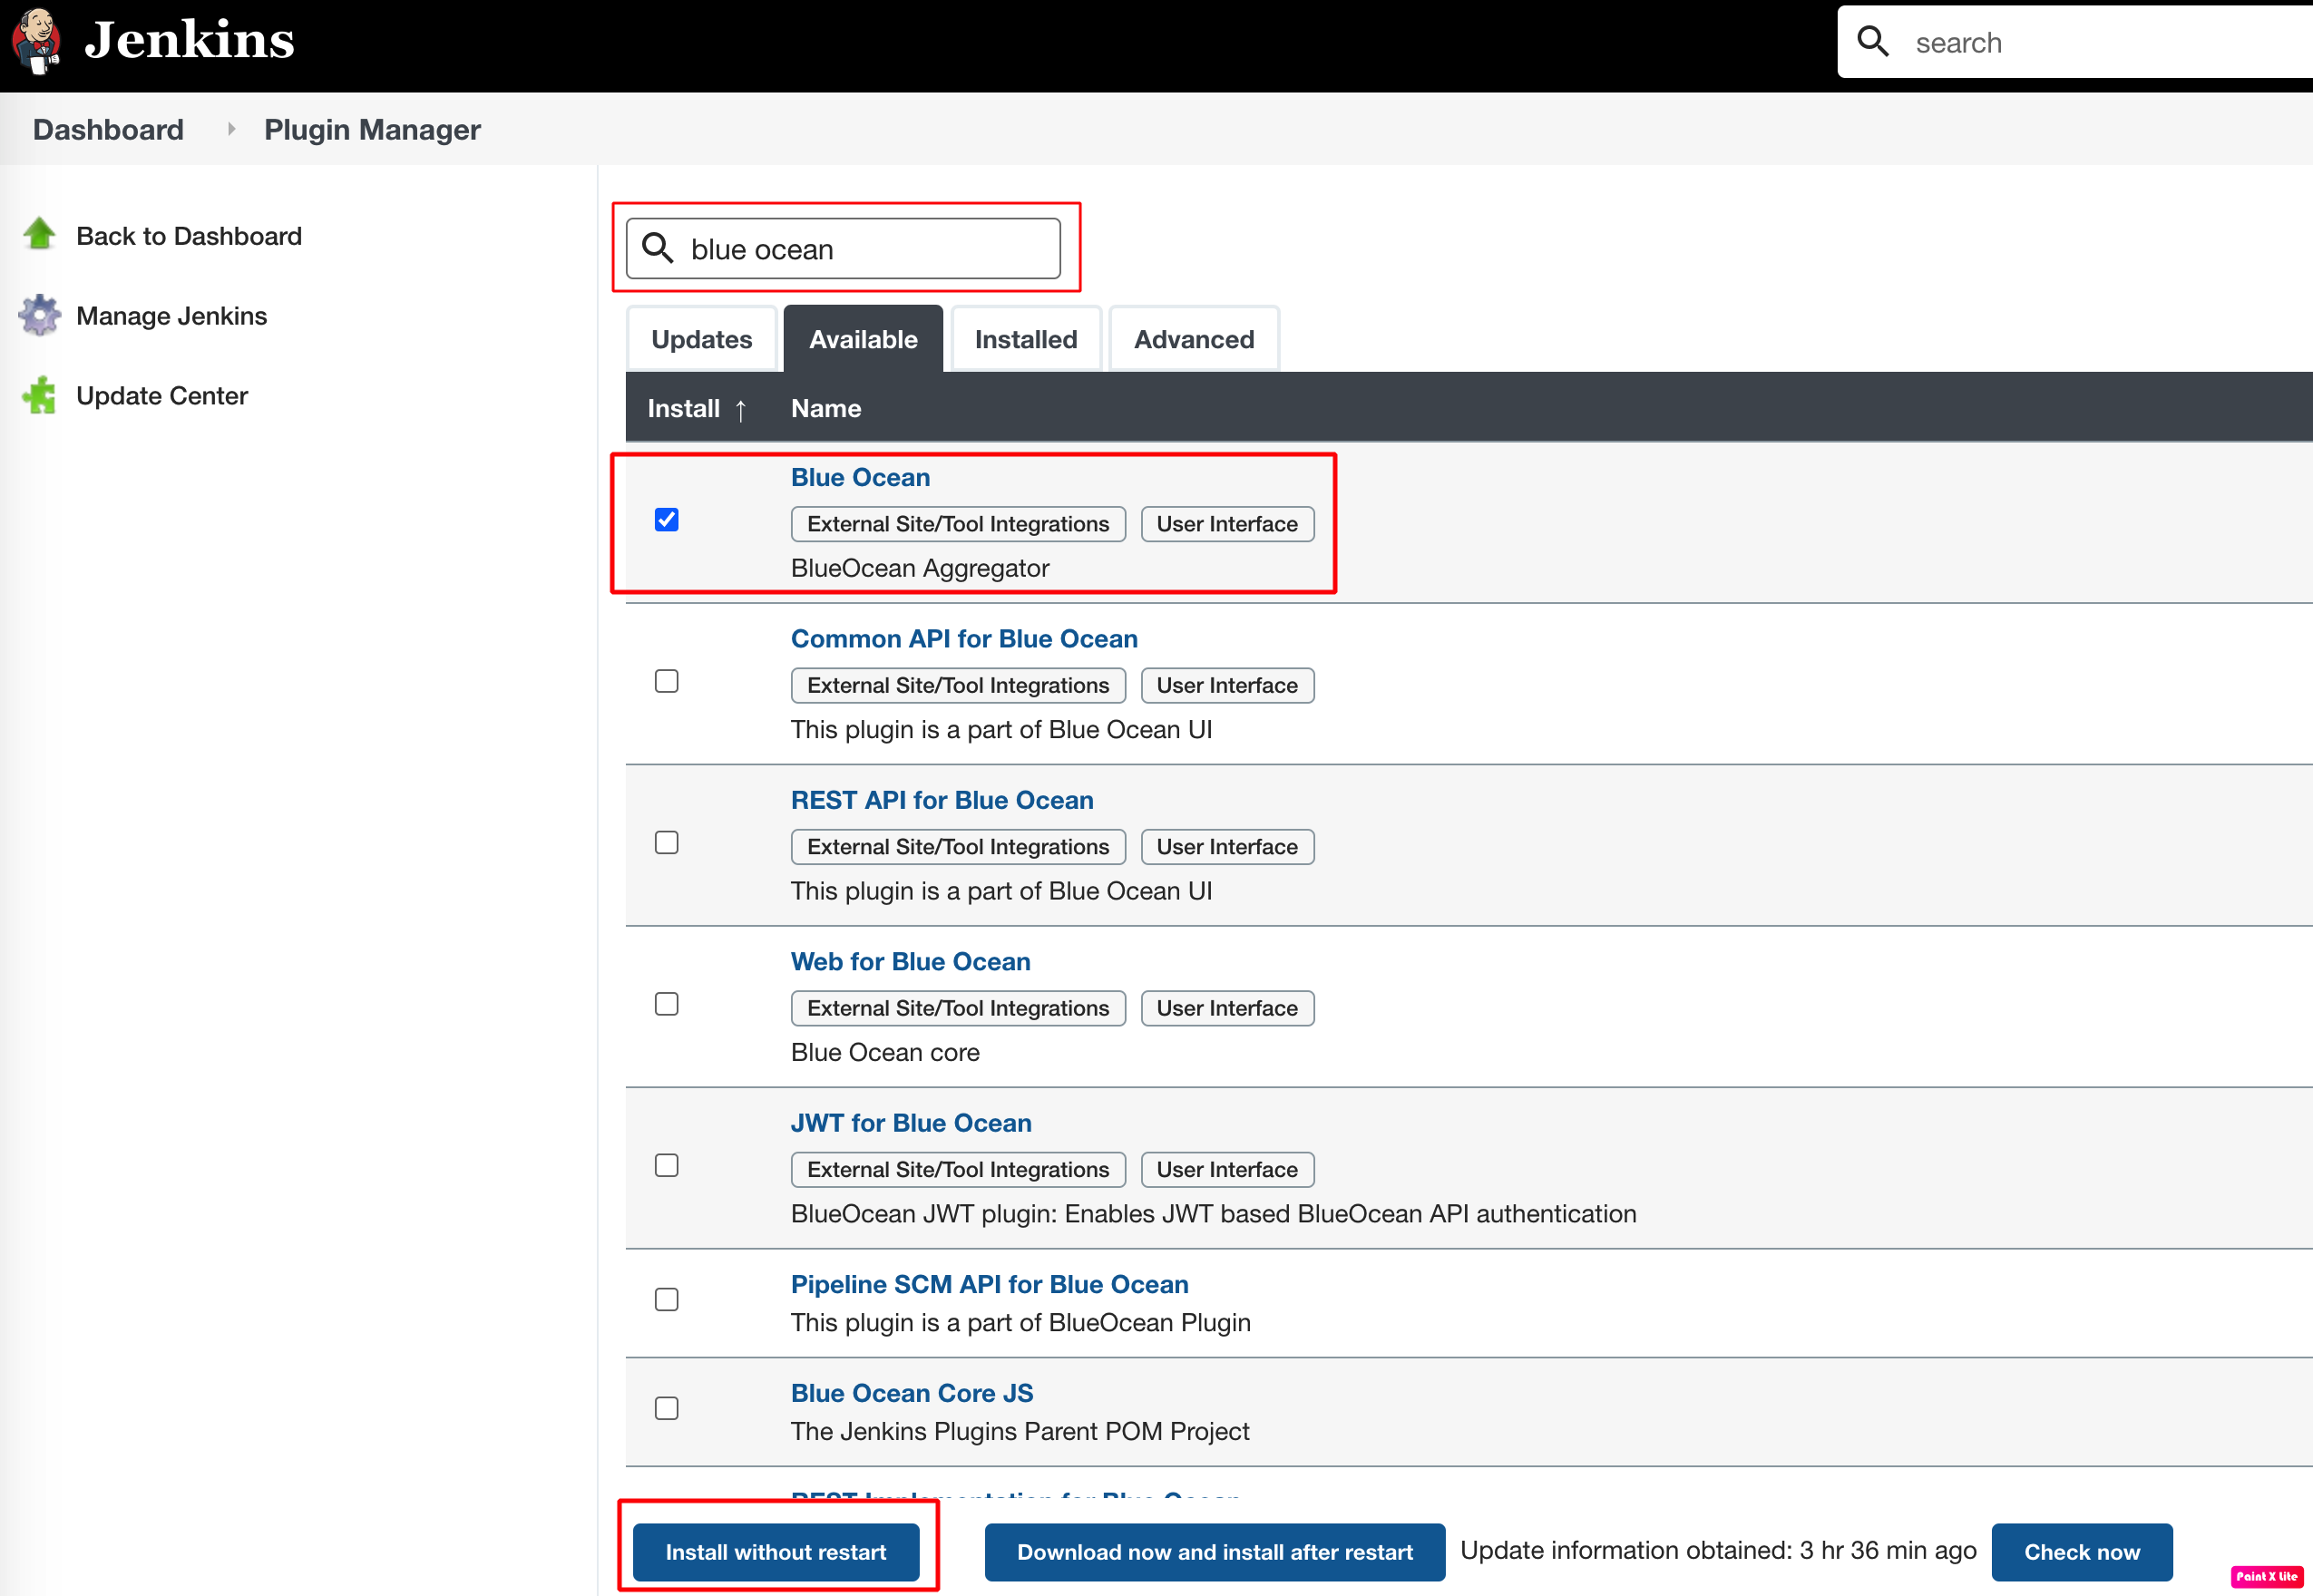
Blue Ocean Plugin과 디펜던시를 가지는 연관 Plugin 자동 설치
2. Provider Application을 Git 리파지터리에 공유
2.1 GitHub에 Provider Application용 리파지터리 생성
각 Application(Provicer와 Consumer) 별로 독자적인 개발 라이프사이클을 위해서 독자적인 Git 리파지터리를 생성합니다.
Github 웹으로 로그인 Github -> New repository 클릭 
repository 이름을 Provider_CICD로 생성
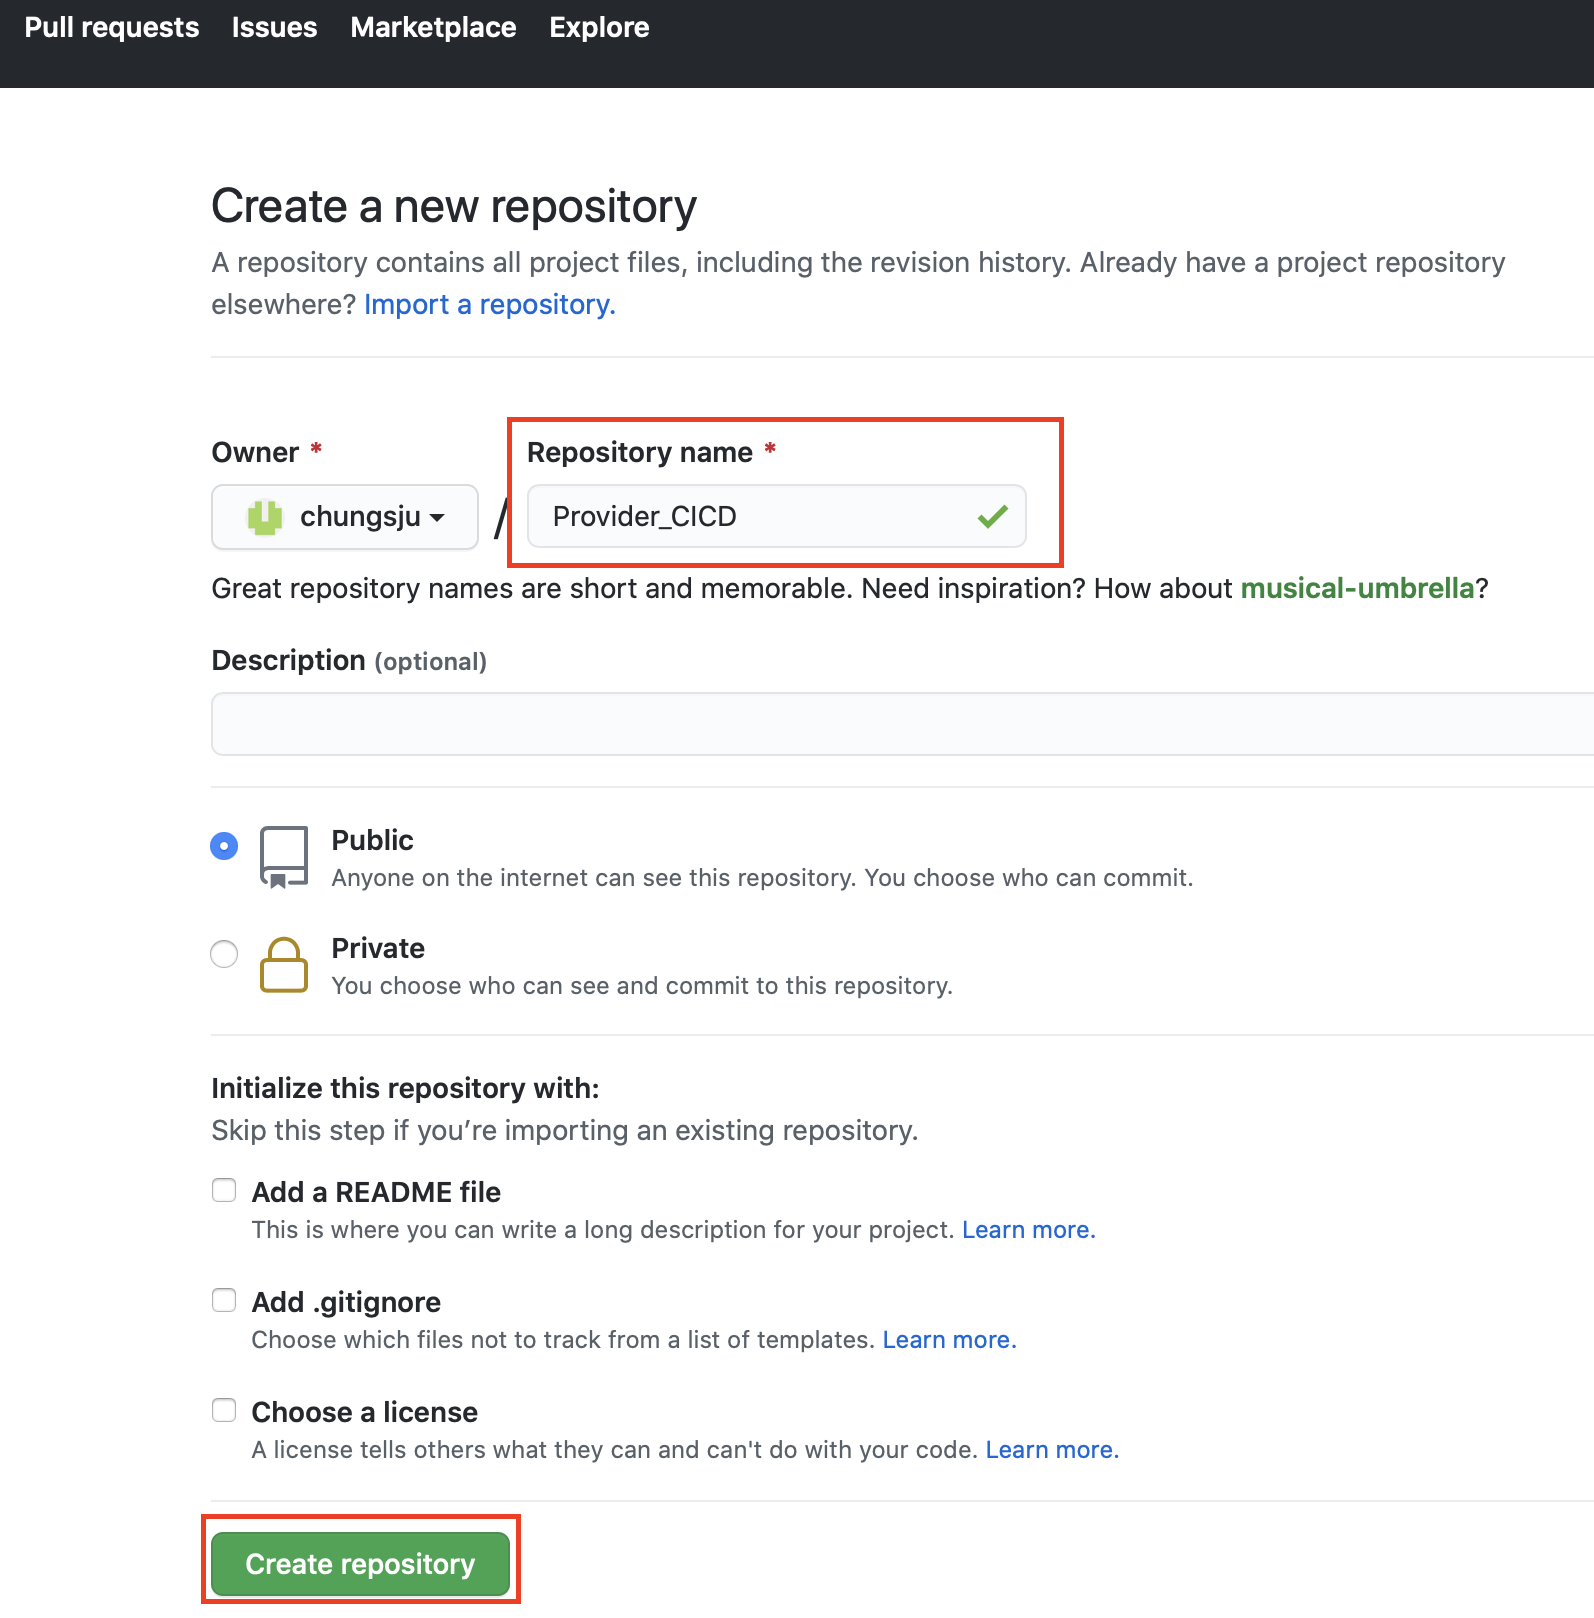
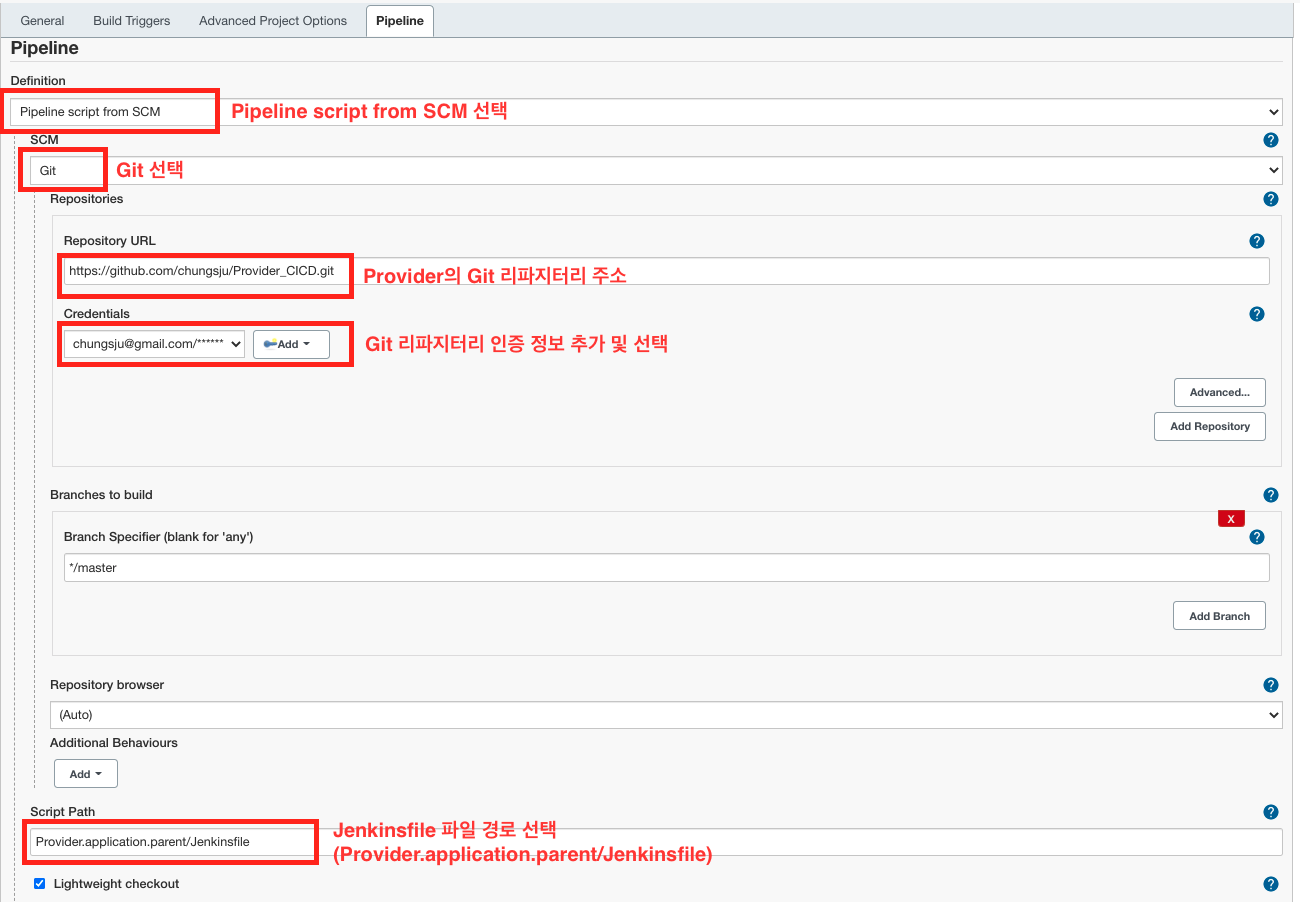
생성된 repository의 URL을 복사합니다. (https://github.com/chungsju/Provider_CICD.git)

2.2. BusinessStudio에 Git 리파지터리 등록
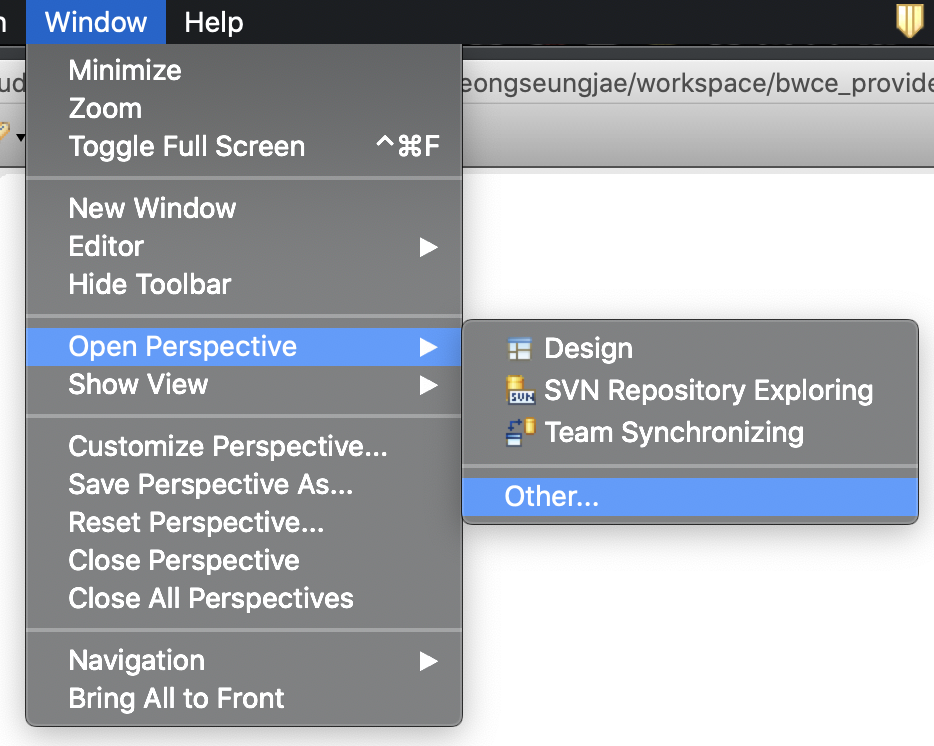
BusinessStudio -> Windows -> Open Perspective -> Other 선택
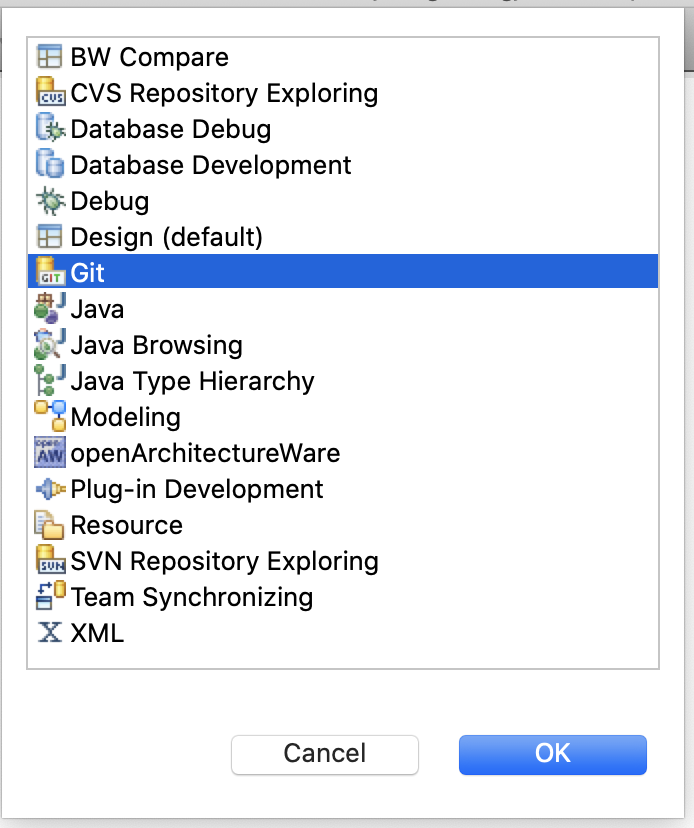
Git Perspective 선택
GitHub의 리파지터리를 Local로 Clone하기

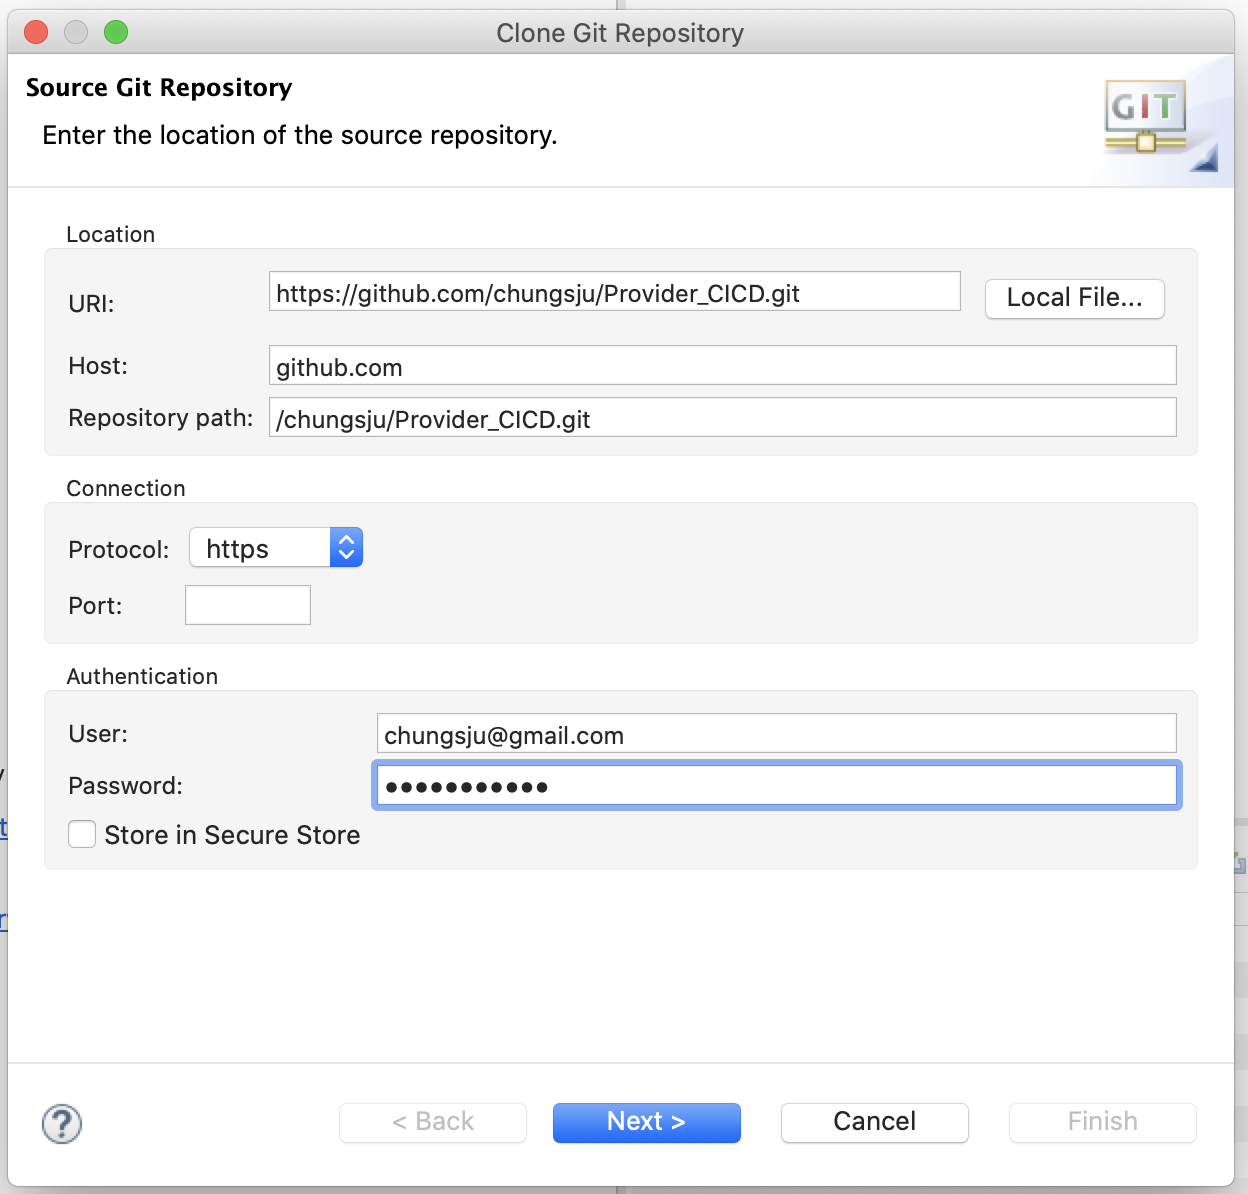
2.3. Provider Application을 Git 리파지터리로 공유
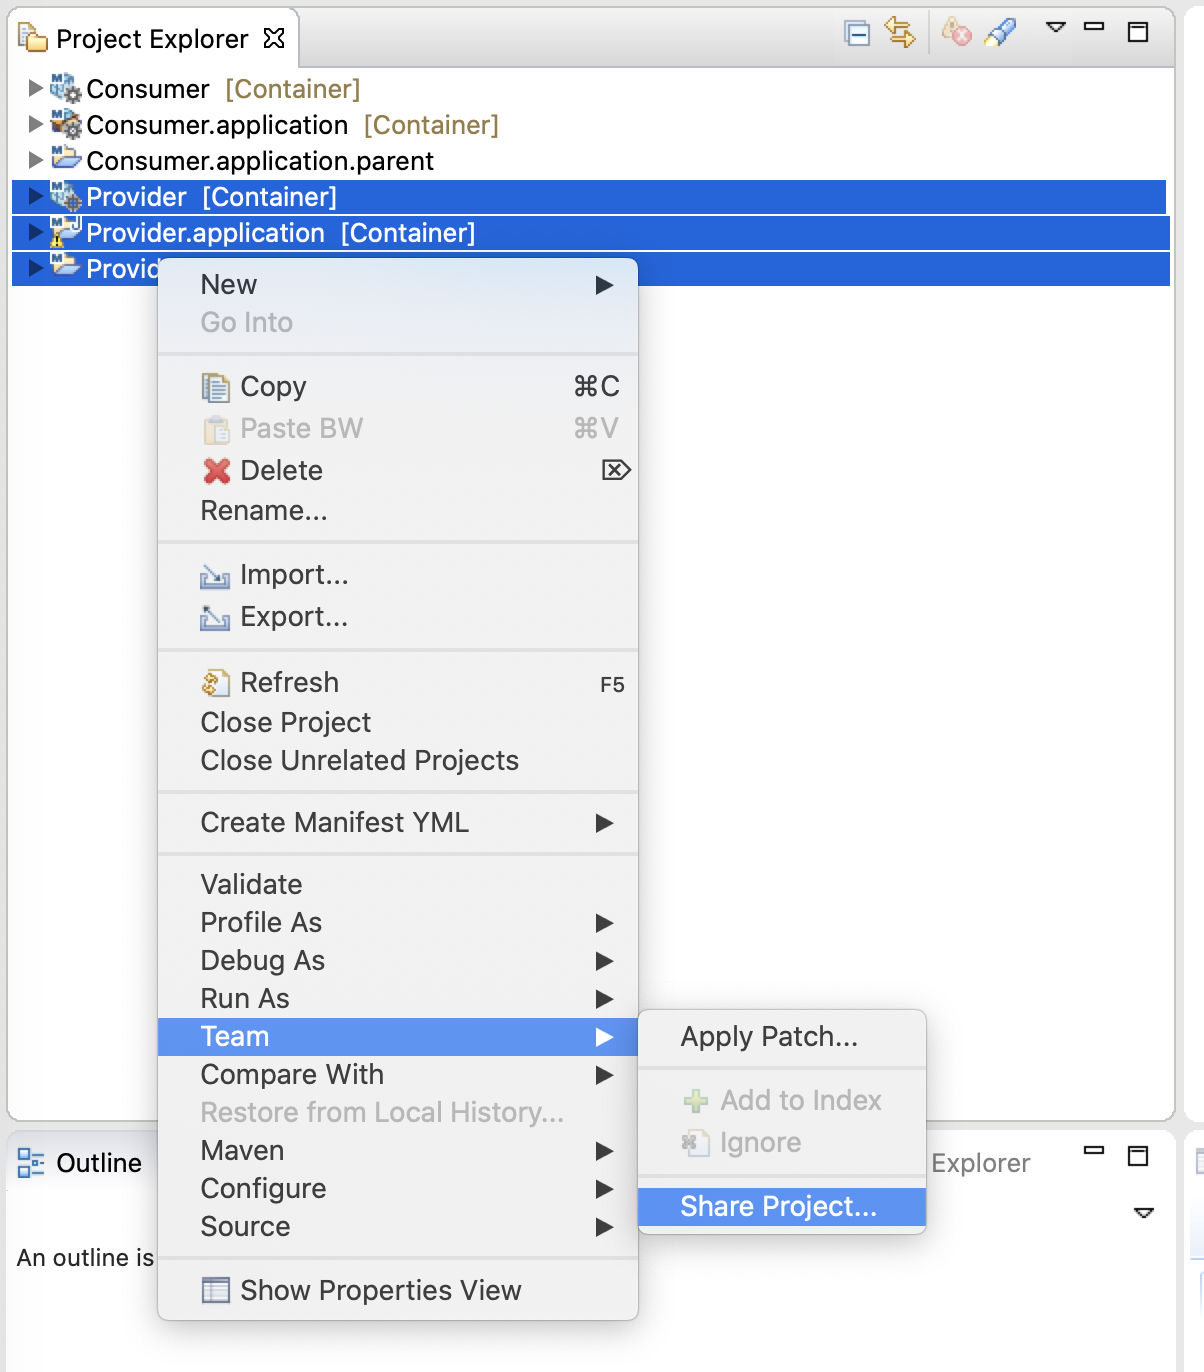
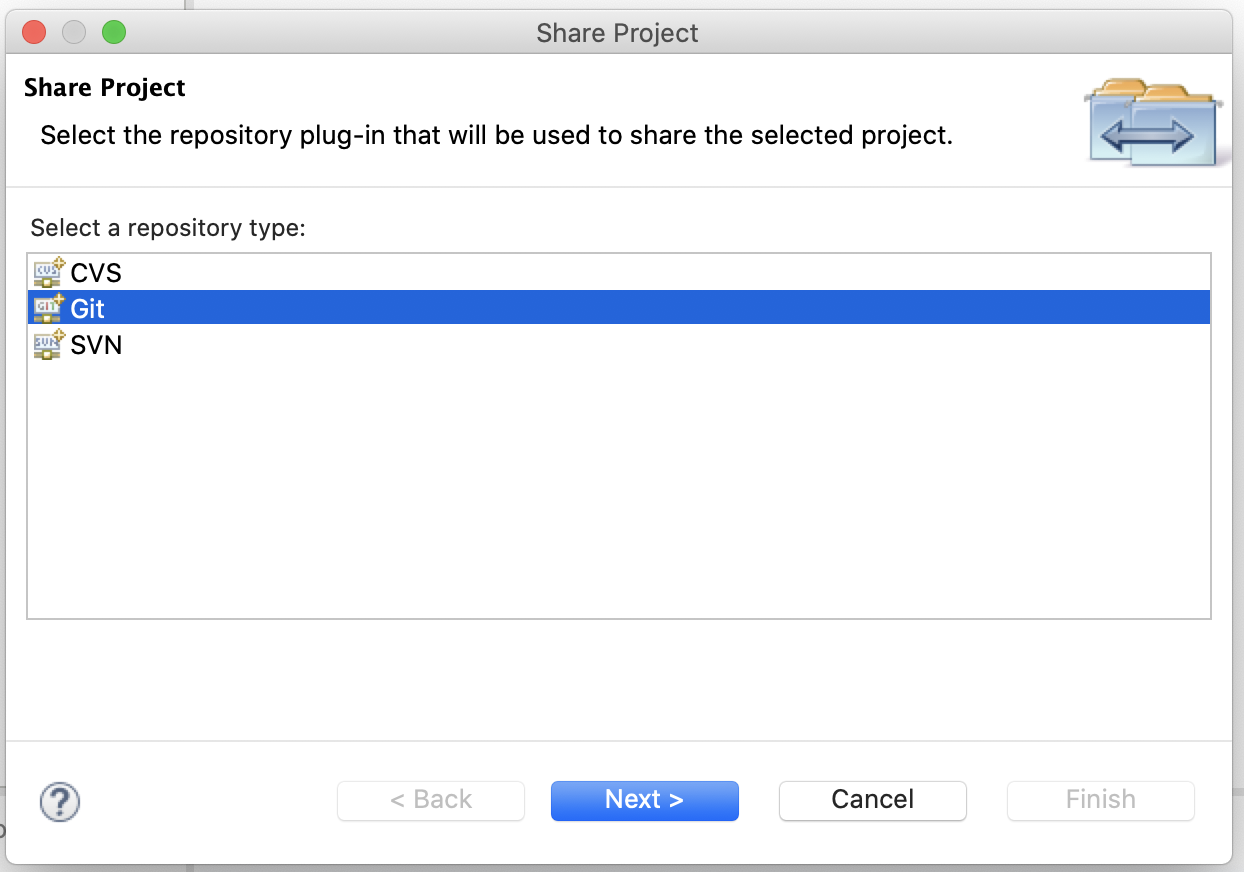
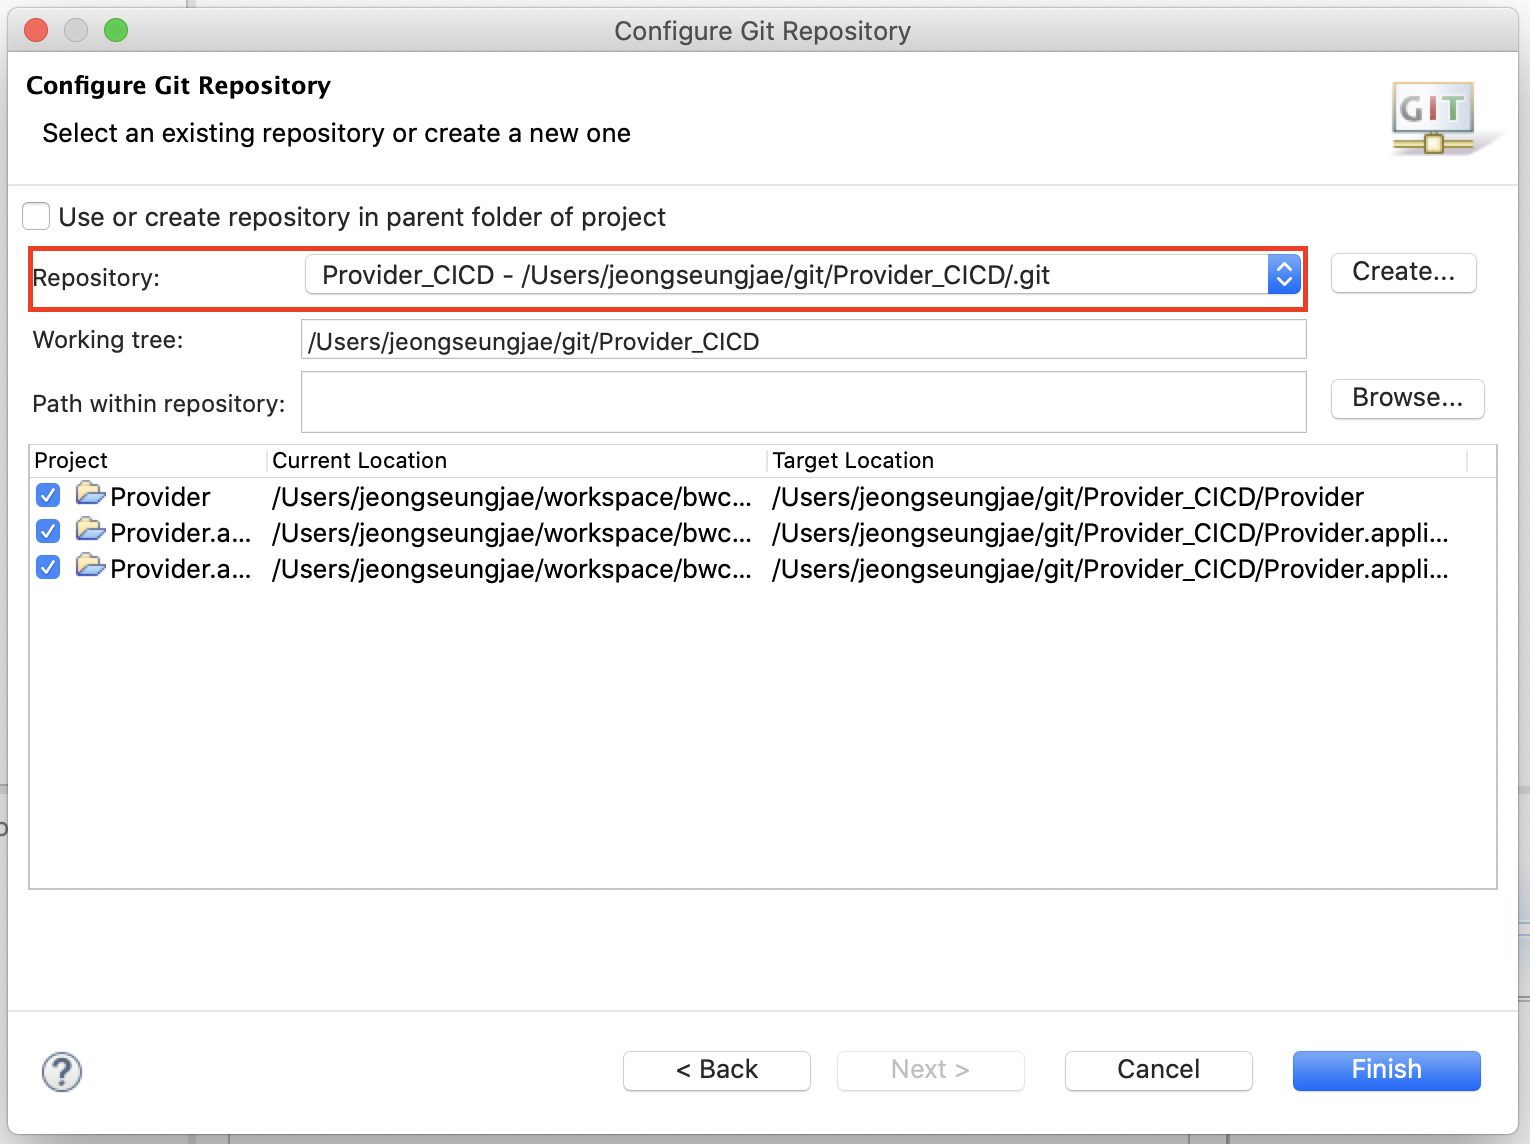
2.4. Provider Application 프로젝트 파일을 Commit & Push 하여 Git 리파지터리로 업로드
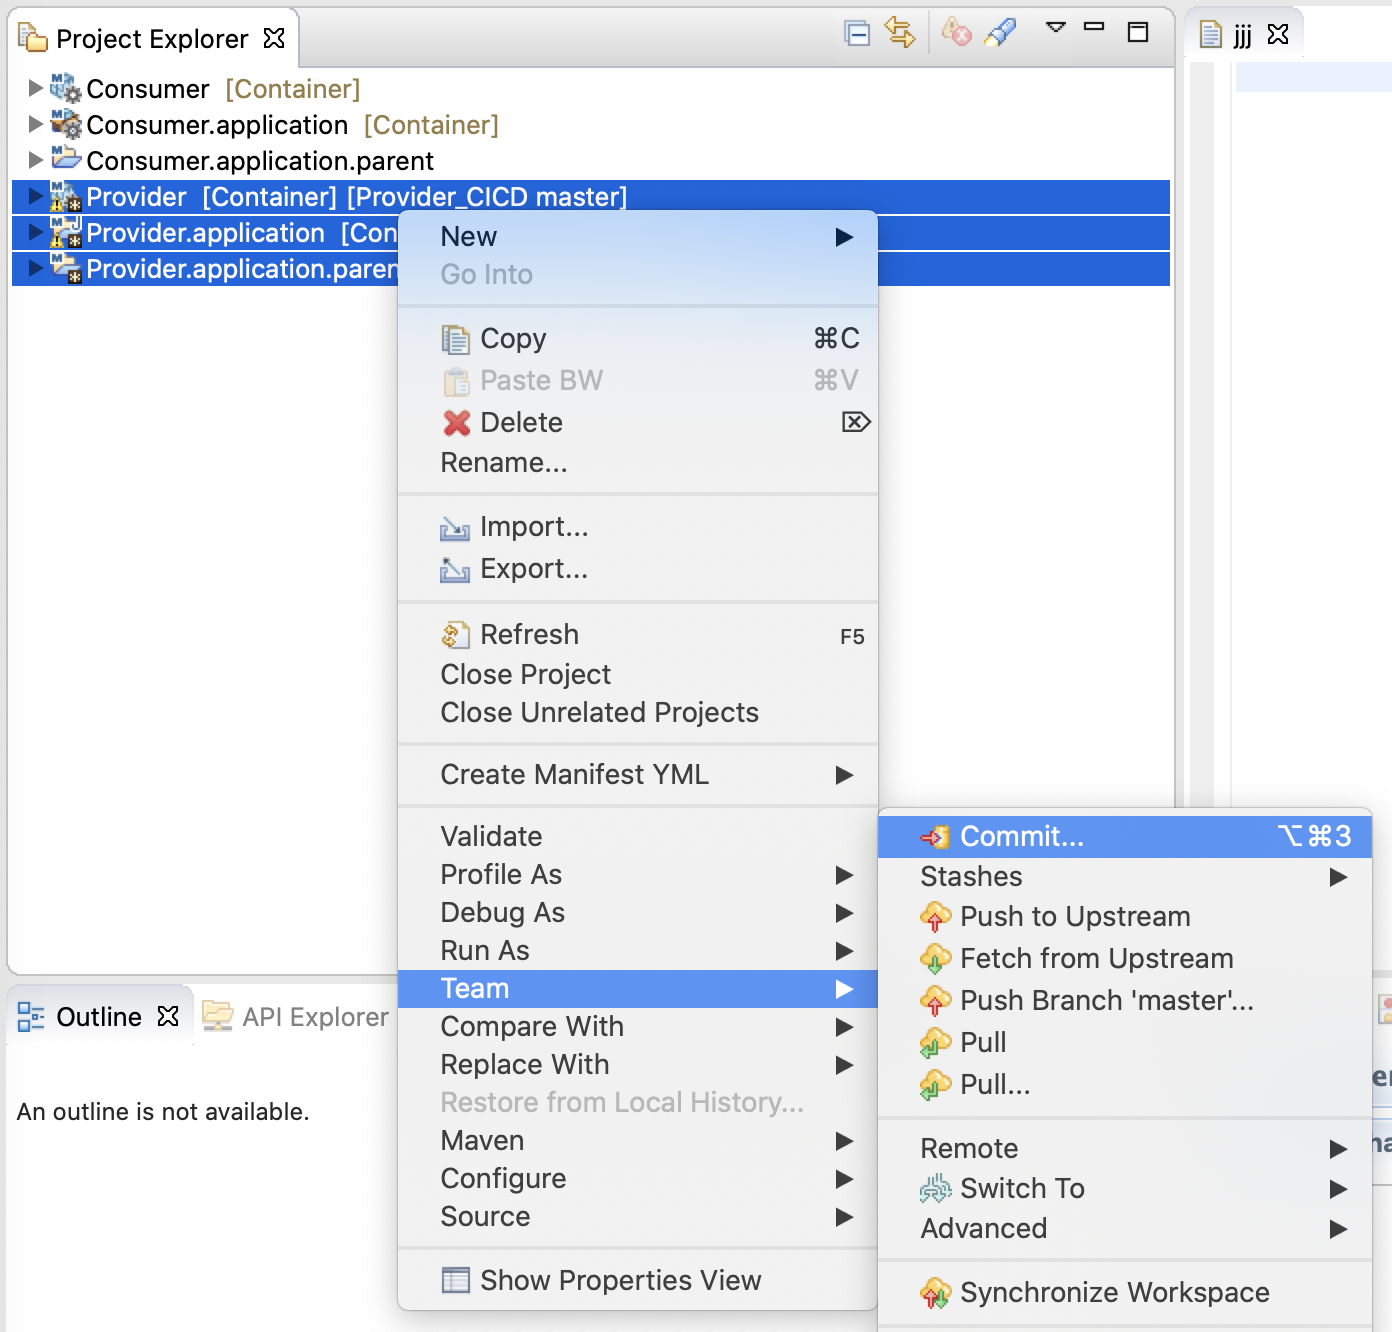
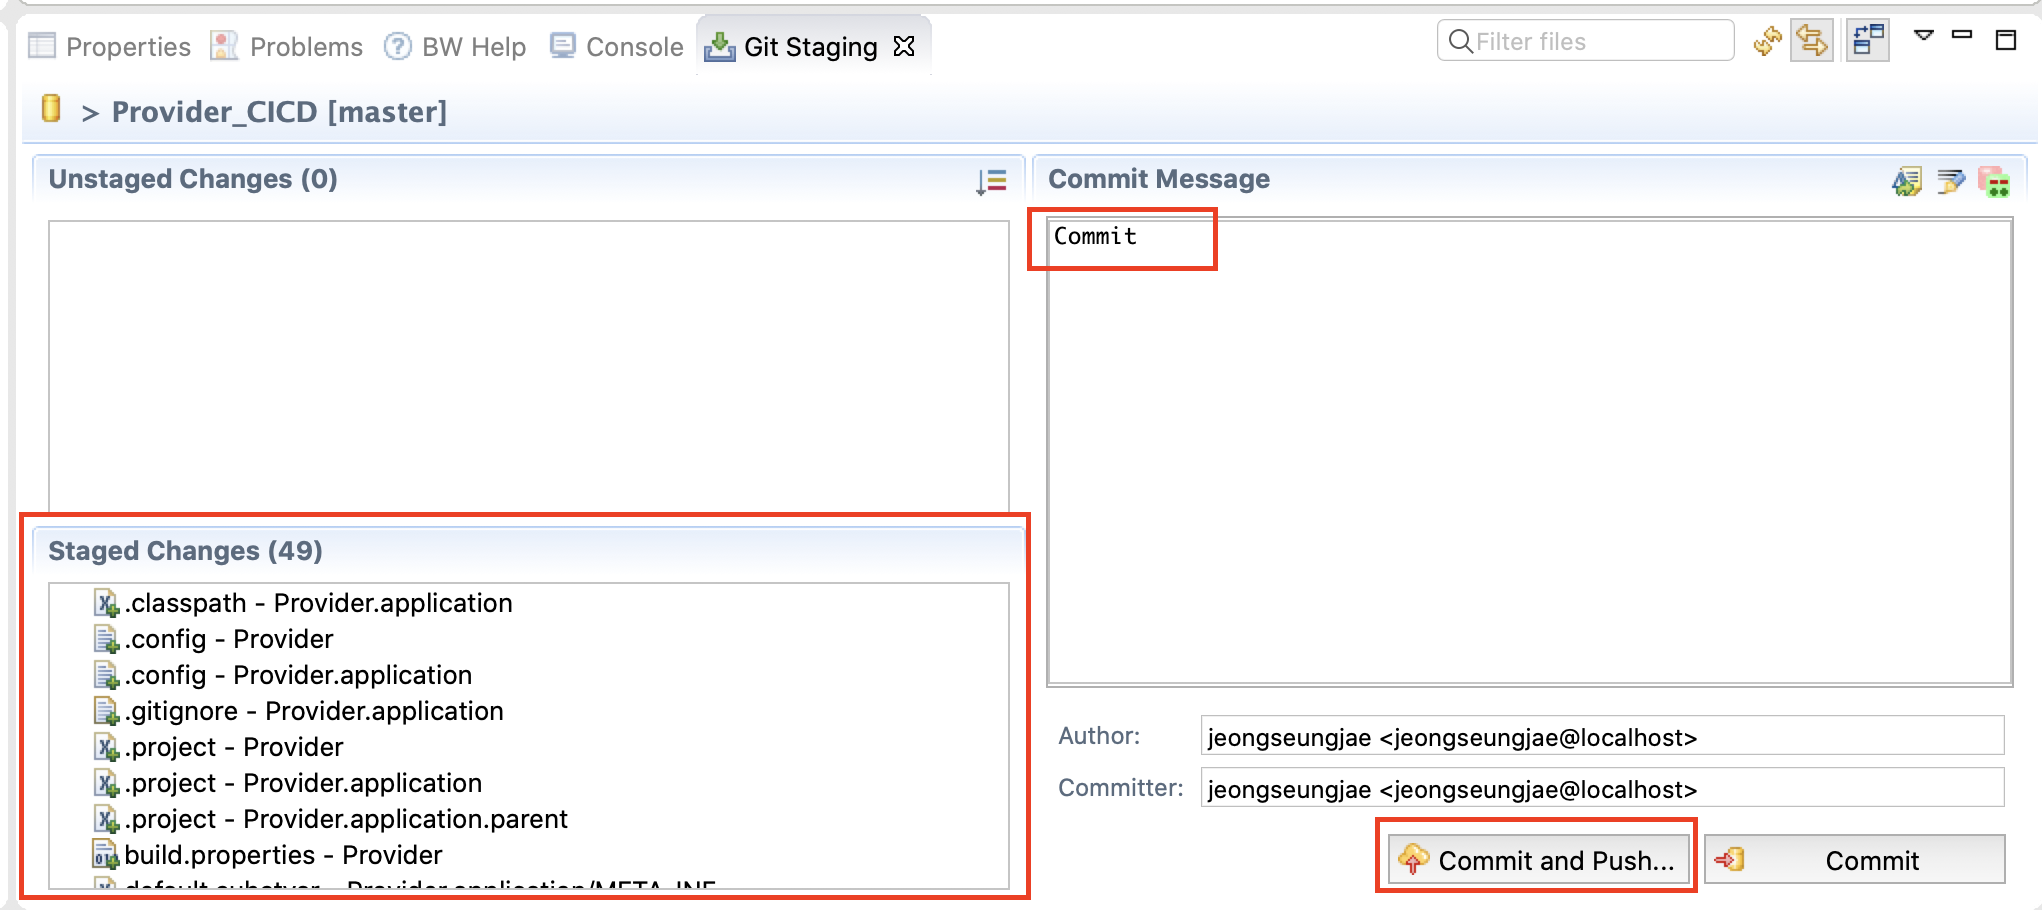
GitHub에서 공유된 Provider Application 프로젝트 확인
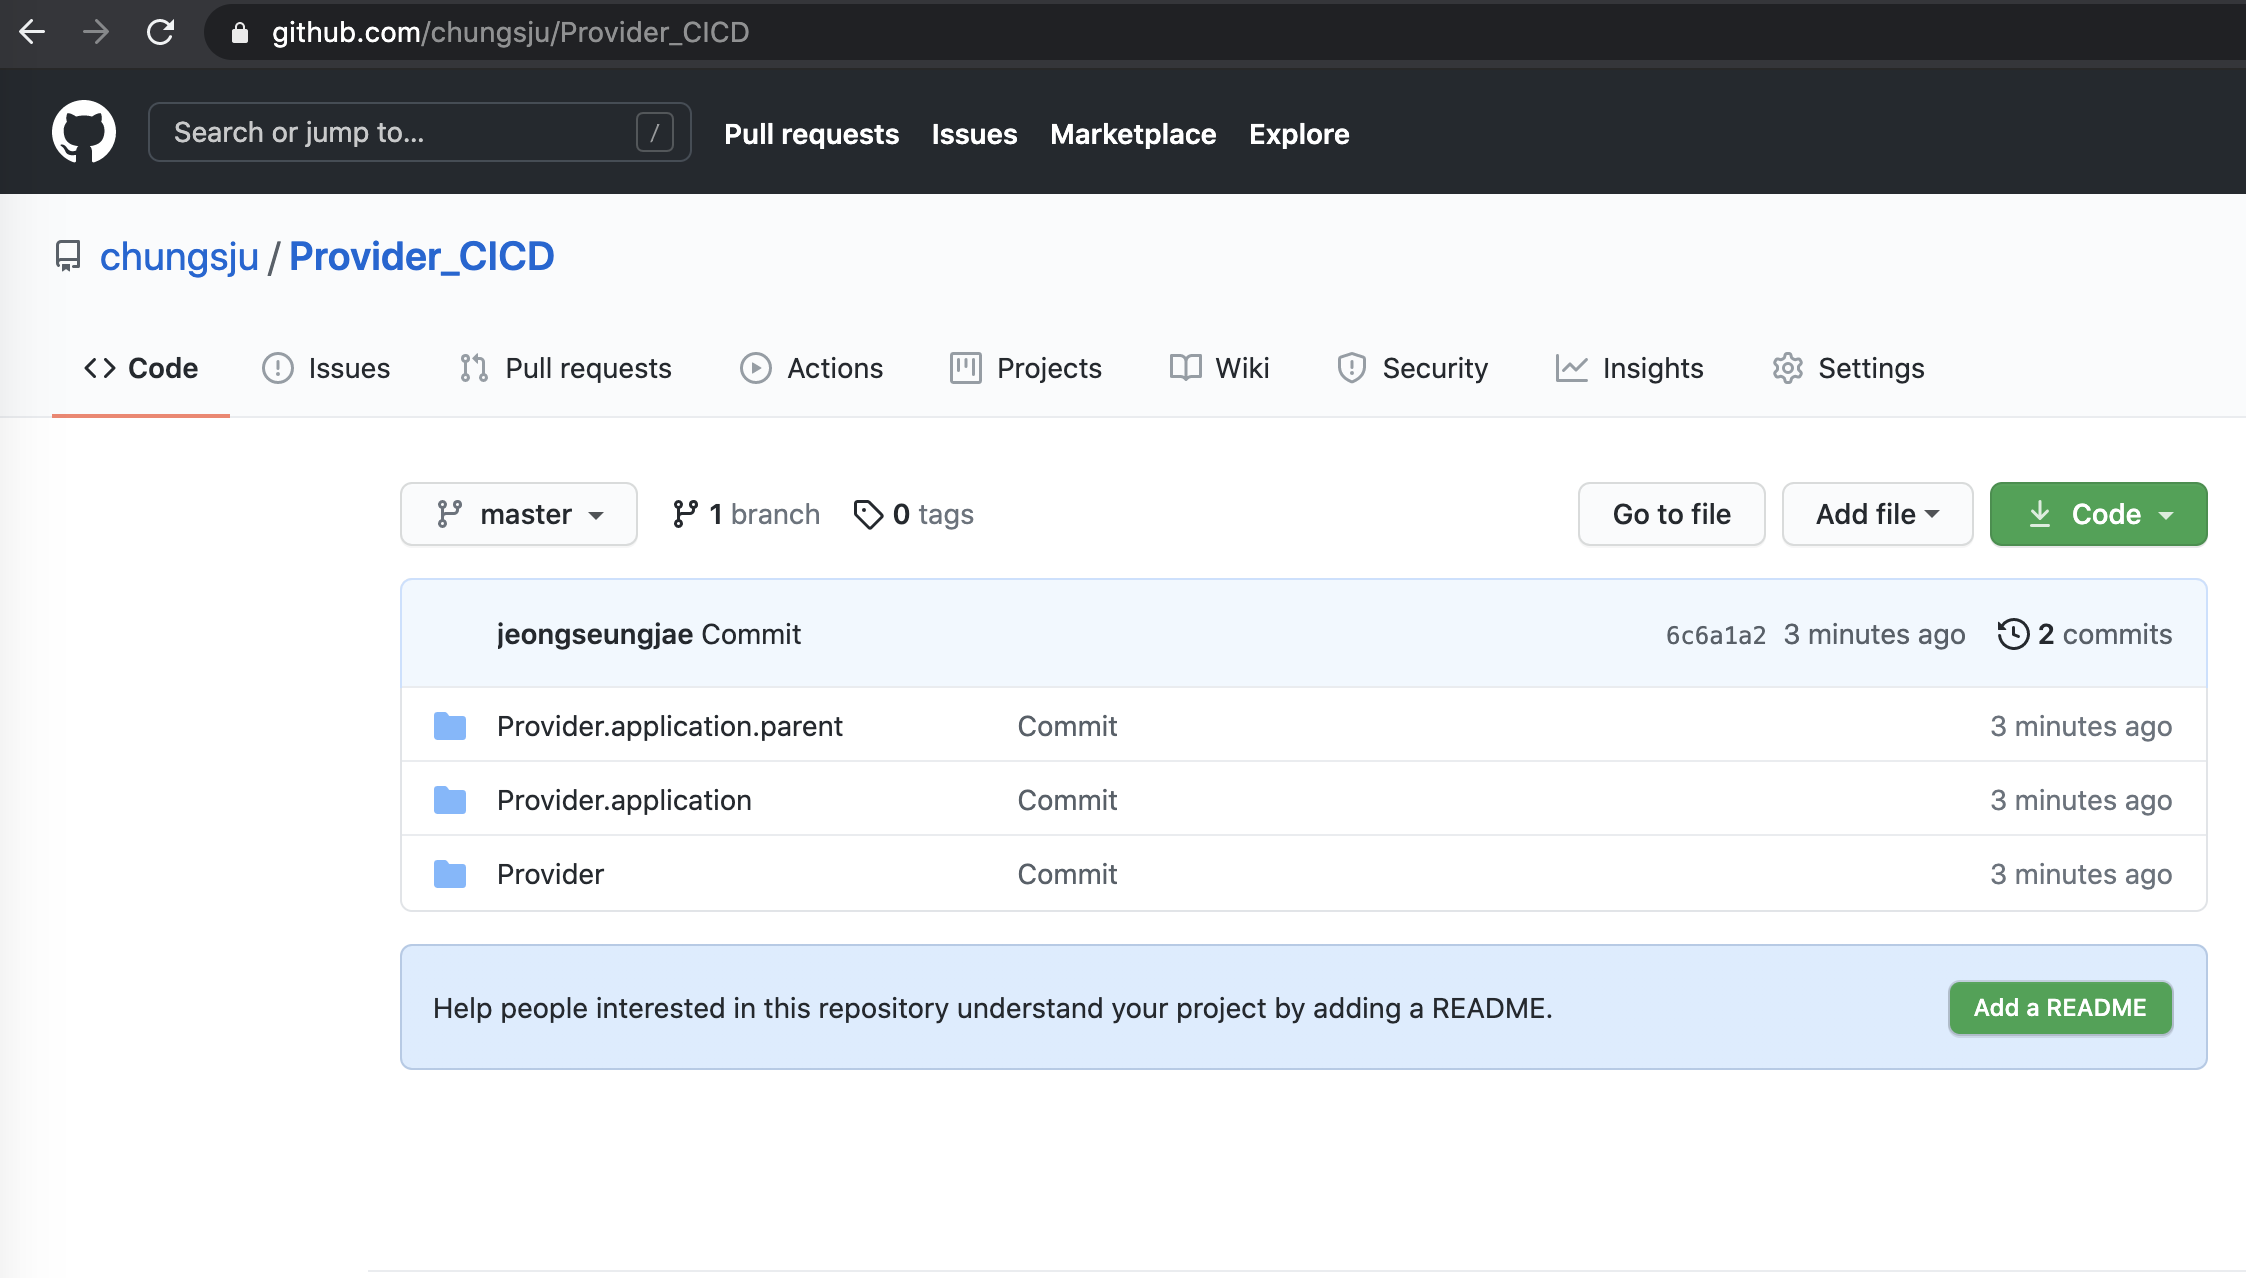
3. Jenkins에서 CI/CD를 위한 Provider Application 일부 변경
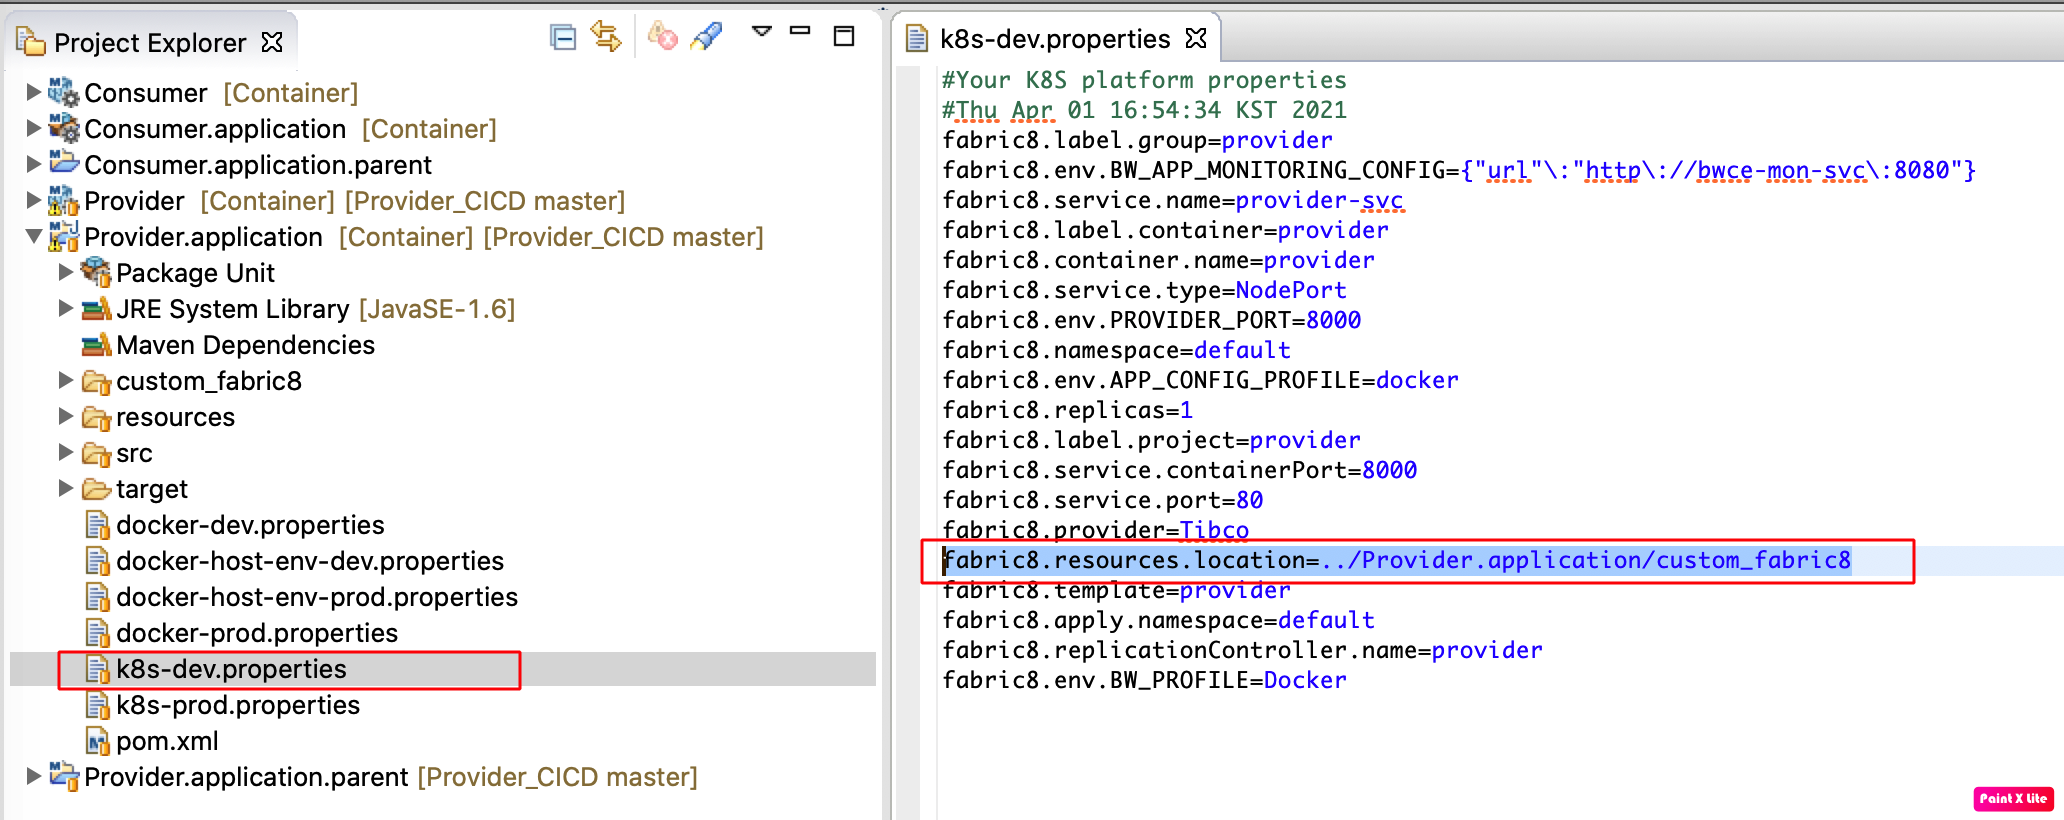
3.1. 커스텀 Kubernetes Resource 경로 변경
Provider.application -> k8s-dev.properites 파일의 fabric8.resources.location(커스텀 Kubernetes Resource 경로) 상대 경로(../Provider.application/custom_fabric8)로 변경
3.2. setting.xml 생성
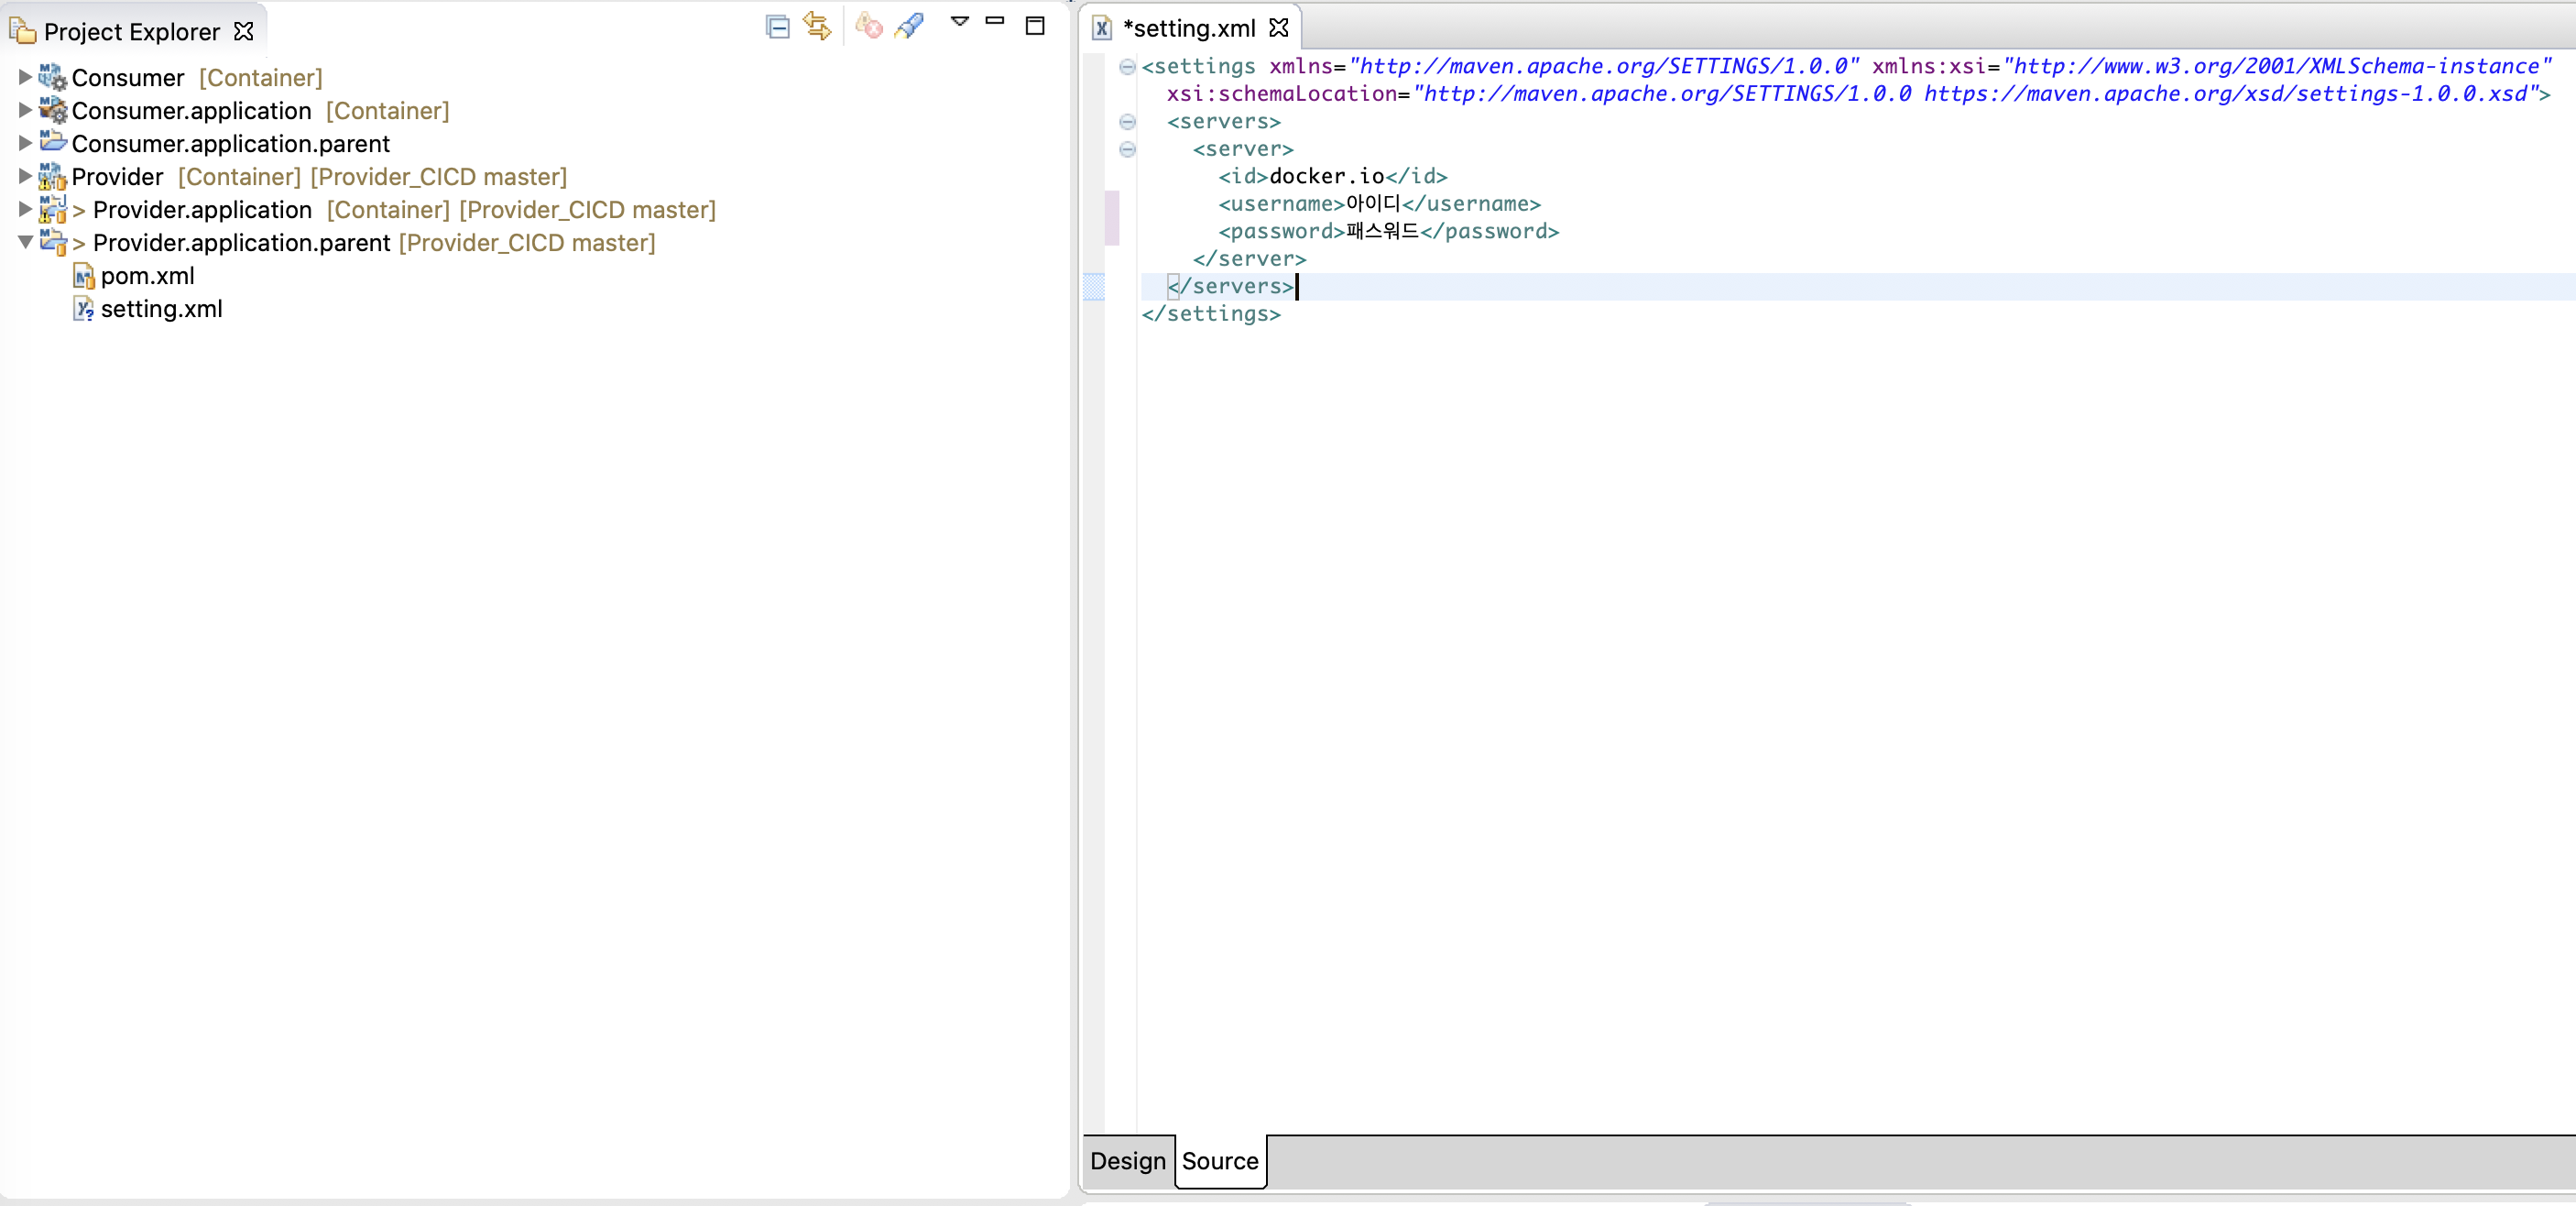
Maven의 설정파일(setting.xml)을 리파지터리 내부에서 관리합니다. 해당 Maven 설정파일(setting.xml)에는 Docker 이미지를 Docker hub에 Push하기 위한 Docker Hub인증 정보를 담습니다.
Provider.application.parent 에 setting.xml 파일을 생성합니다.
<settings xmlns="http://maven.apache.org/SETTINGS/1.0.0" xmlns:xsi="http://www.w3.org/2001/XMLSchema-instance"
  xsi:schemaLocation="http://maven.apache.org/SETTINGS/1.0.0 https://maven.apache.org/xsd/settings-1.0.0.xsd">
  <servers>
    <server>
      <id>docker.io</id>
      <username>아이디</username>
      <password>패스워드</password>
    </server>
  </servers>
</settings>
3.3. jenkins 파일 생성
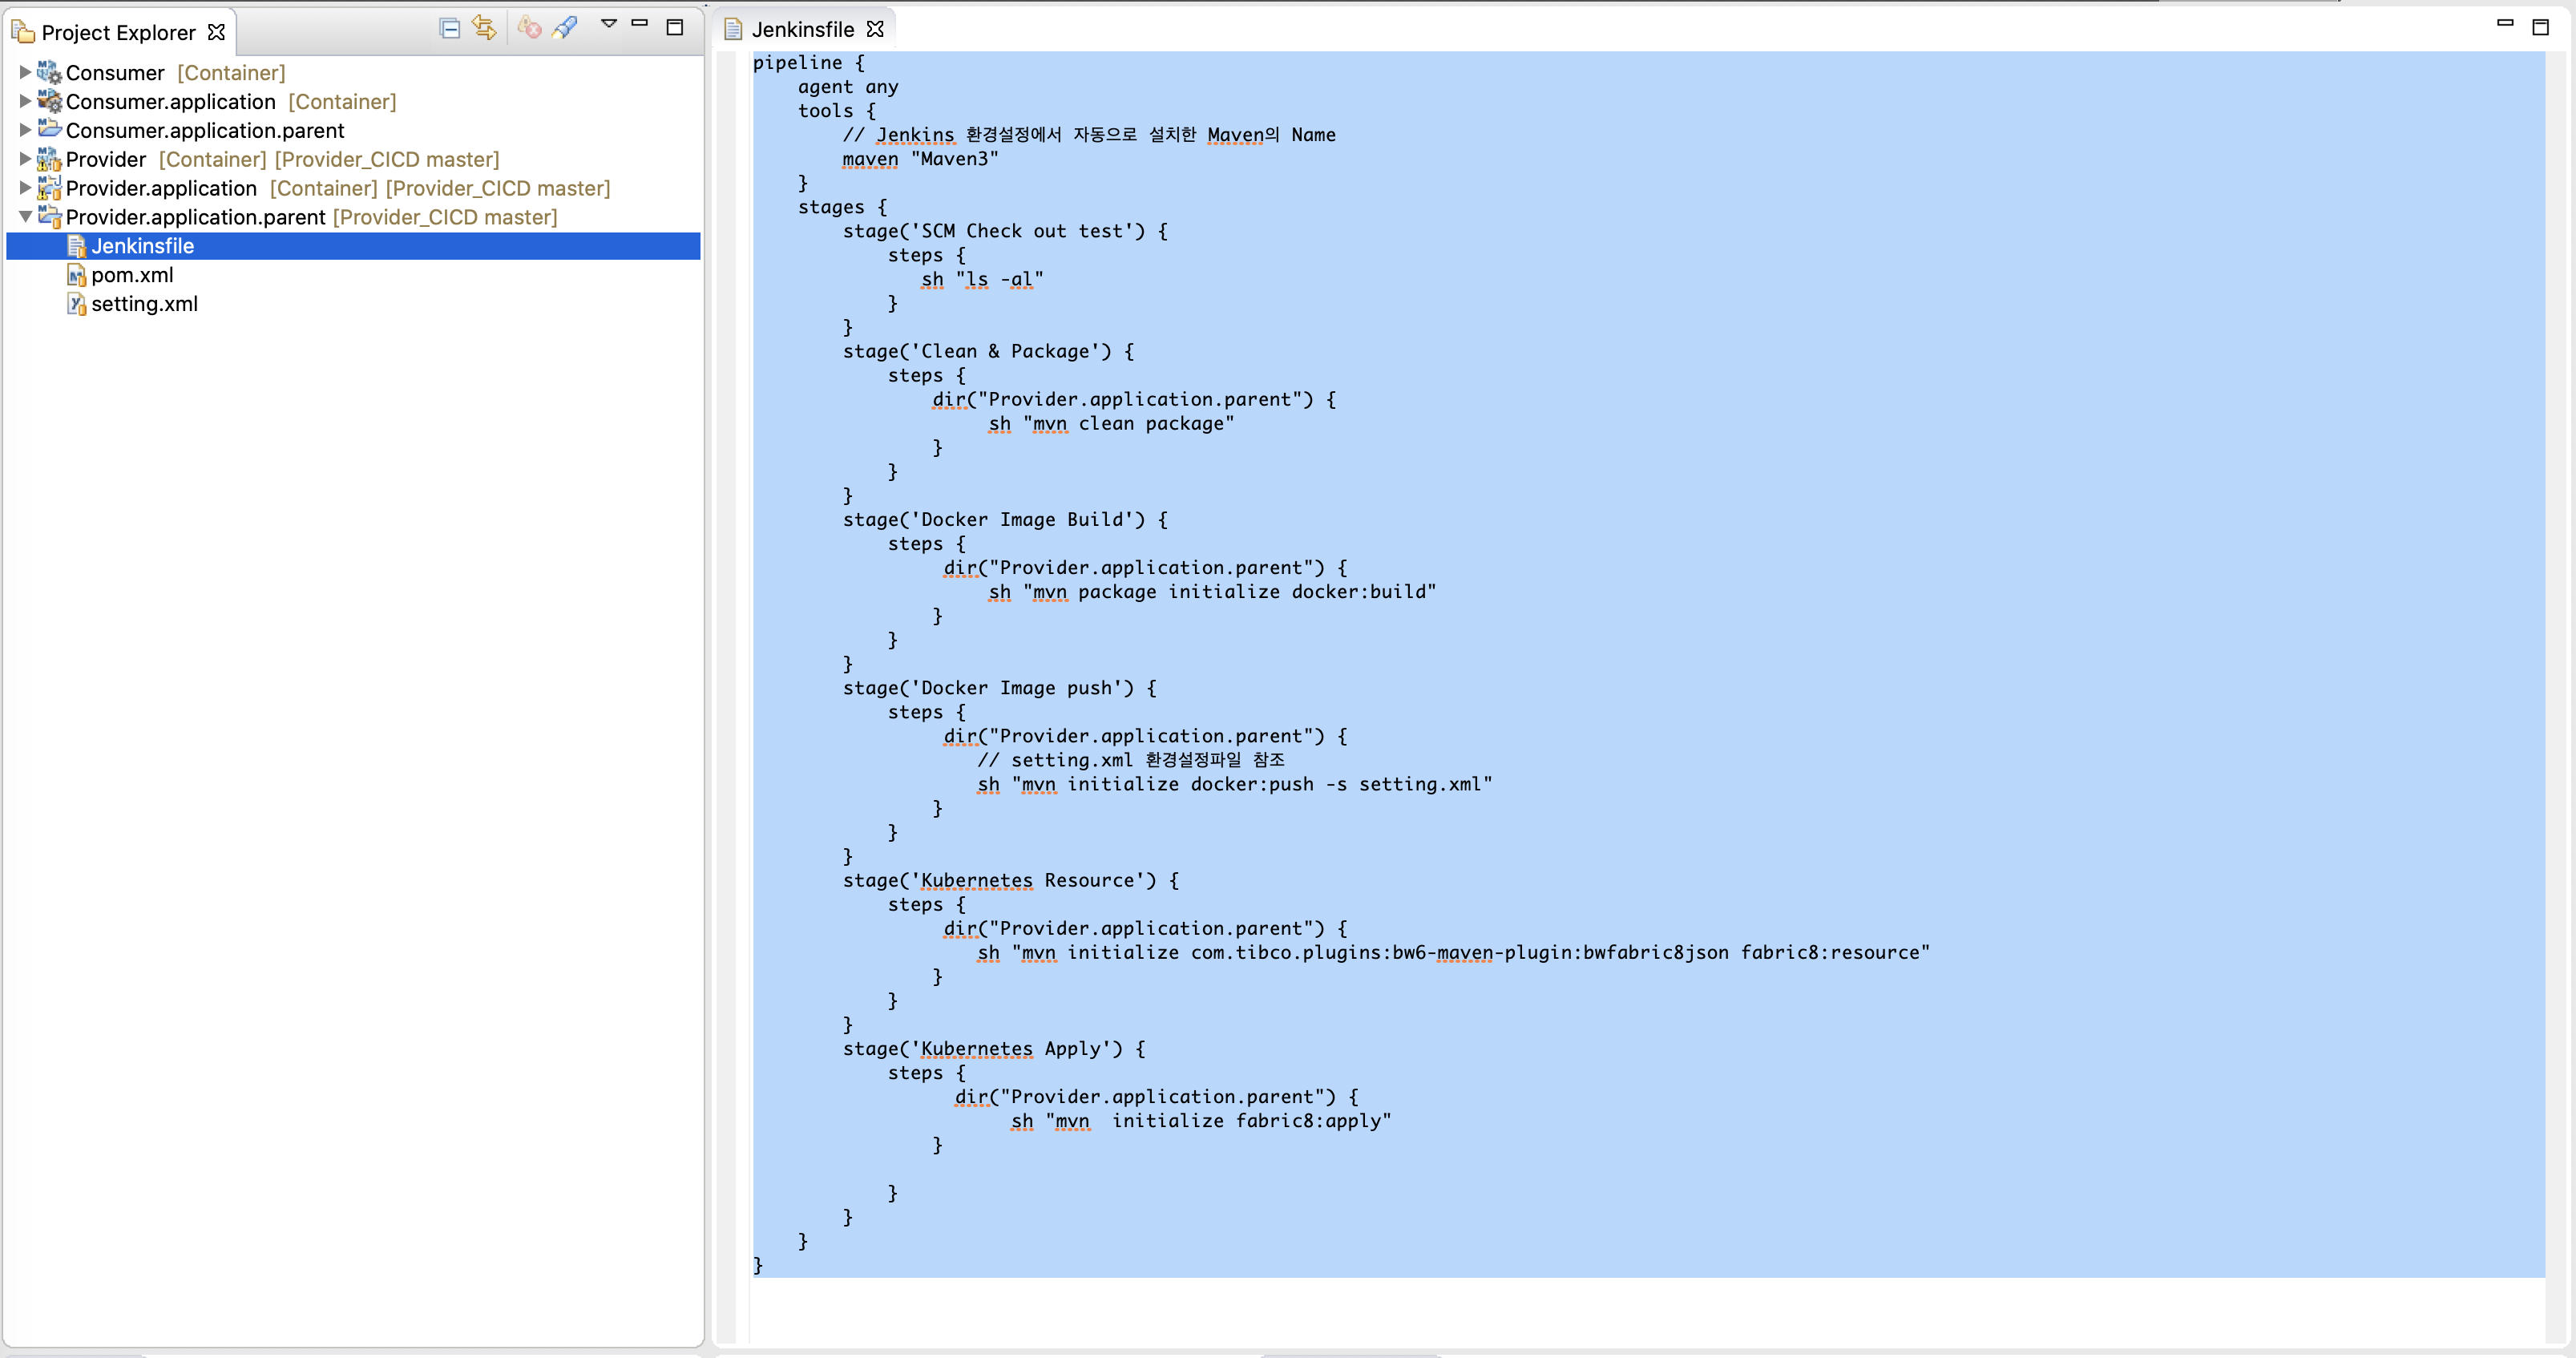
Jenkins에서 사용될 Build 파이프 라인을 설정합니다.
Provider.application.parent 에 Jenkinsfile.xml 파일을 생성합니다.
pipeline {
    agent any
    tools {
        // Jenkins 환경설정에서 자동으로 설치한 Maven의 Name
        maven "Maven3"
    }
	stages {
        stage('SCM Check out test') {
            steps {
               sh "ls -al"
            }
        }
        stage('Clean & Package') {
            steps {
                dir("Provider.application.parent") {
               		 sh "mvn clean package"
               	}
            }
        }
        stage('Docker Image Build') {
            steps {
            	 dir("Provider.application.parent") {
               		 sh "mvn package initialize docker:build"
               	}
            }
        }
        stage('Docker Image push') {
            steps {
                 dir("Provider.application.parent") {
               		// setting.xml 환경설정파일 참조
                 	sh "mvn initialize docker:push -s setting.xml"
               	}
            }
        }
        stage('Kubernetes Resource') {
            steps {
                 dir("Provider.application.parent") {
                 	sh "mvn initialize com.tibco.plugins:bw6-maven-plugin:bwfabric8json fabric8:resource"
               	}
            }
        }
        stage('Kubernetes Apply') {
            steps {
                  dir("Provider.application.parent") {
                 	   sh "mvn  initialize fabric8:apply"
               	}

            }
        }
    }
}
3.4. commit & push
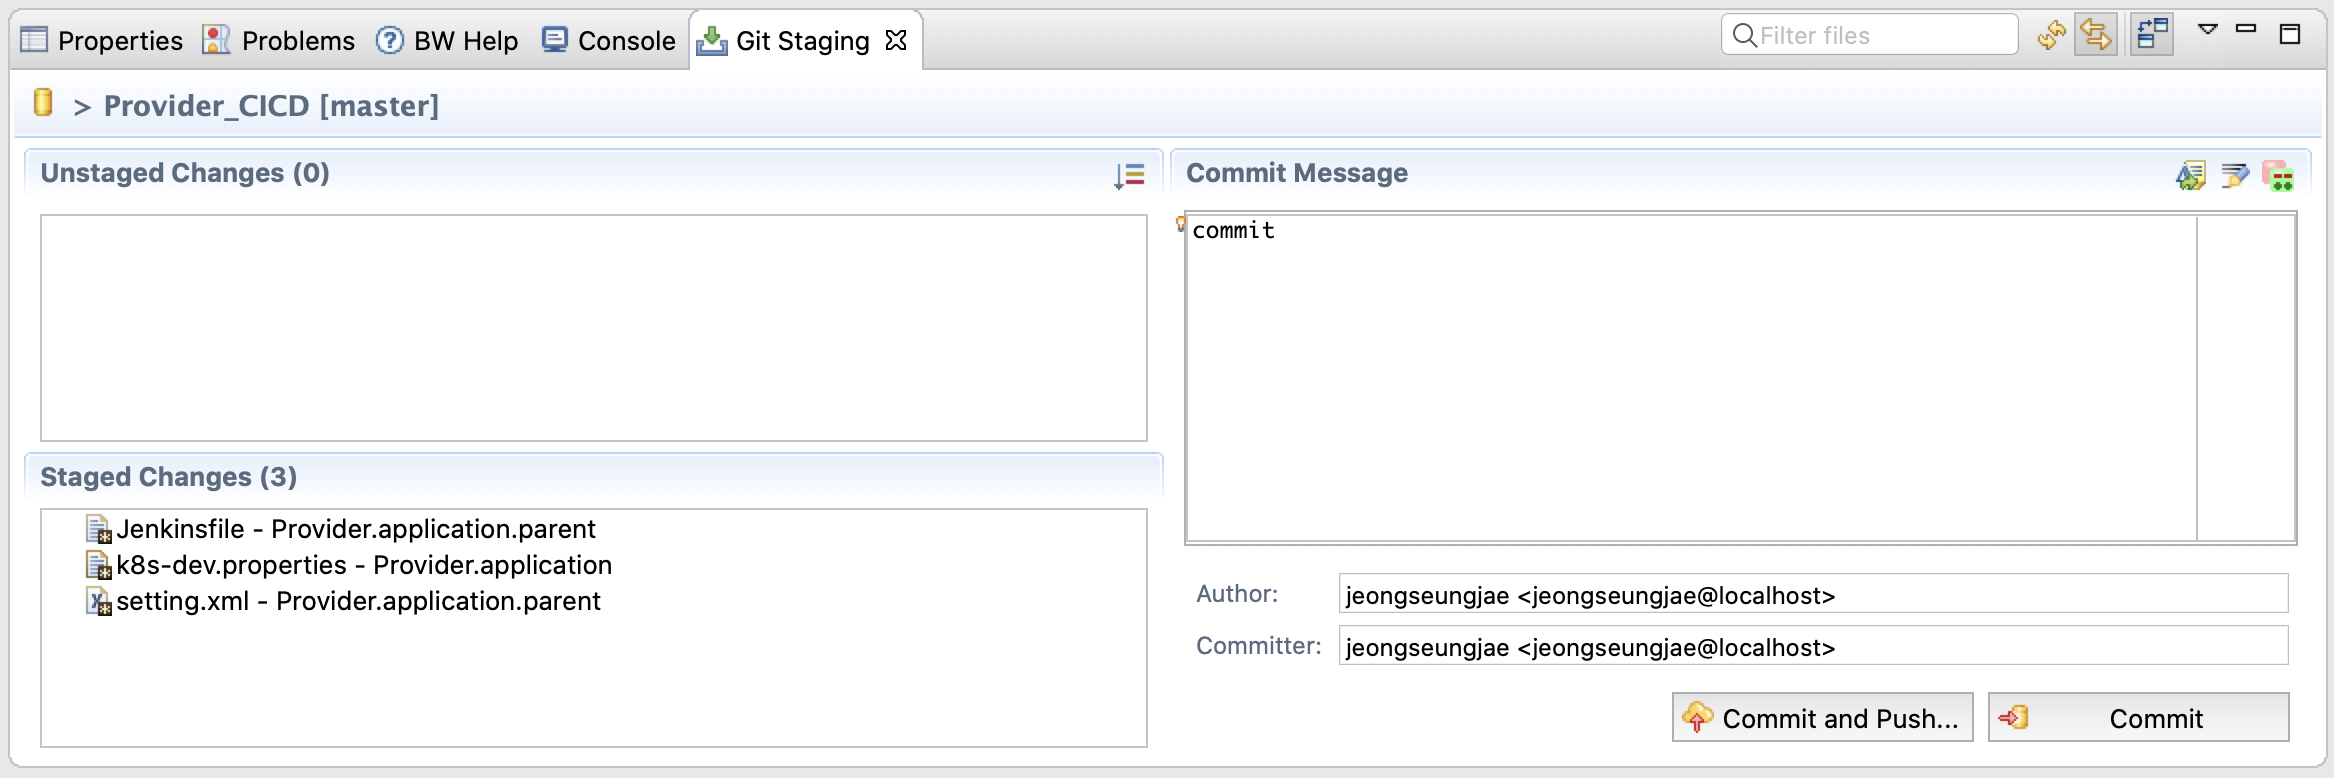
변경 및 추가된 Provider.application/k8s-dev.properites , Provider.application.parent/setting.xml, Provider.application.parent/Jenkinsfile.xml 을 Git 리파지터리에 Commit 및 push 합니다.
4. Jenkins Pipeline 빌드
4.1. Jenkins Pipeline Job 생성
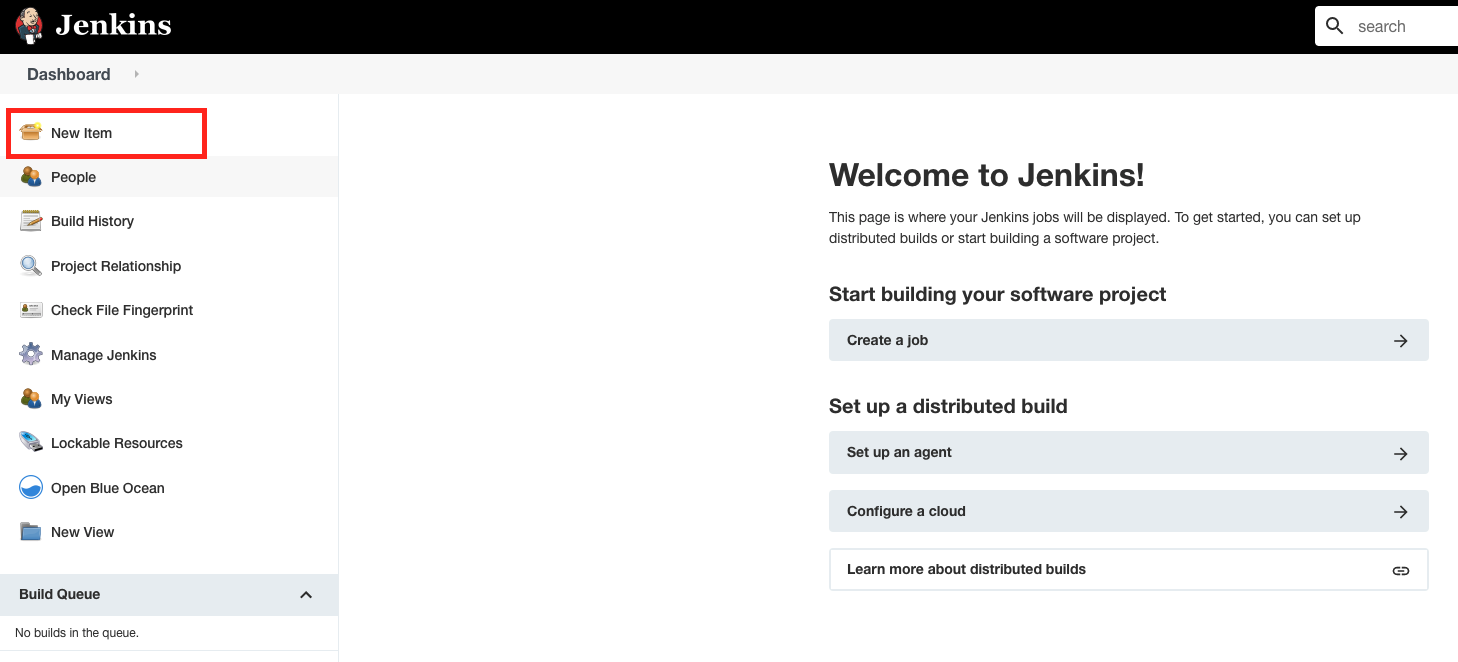
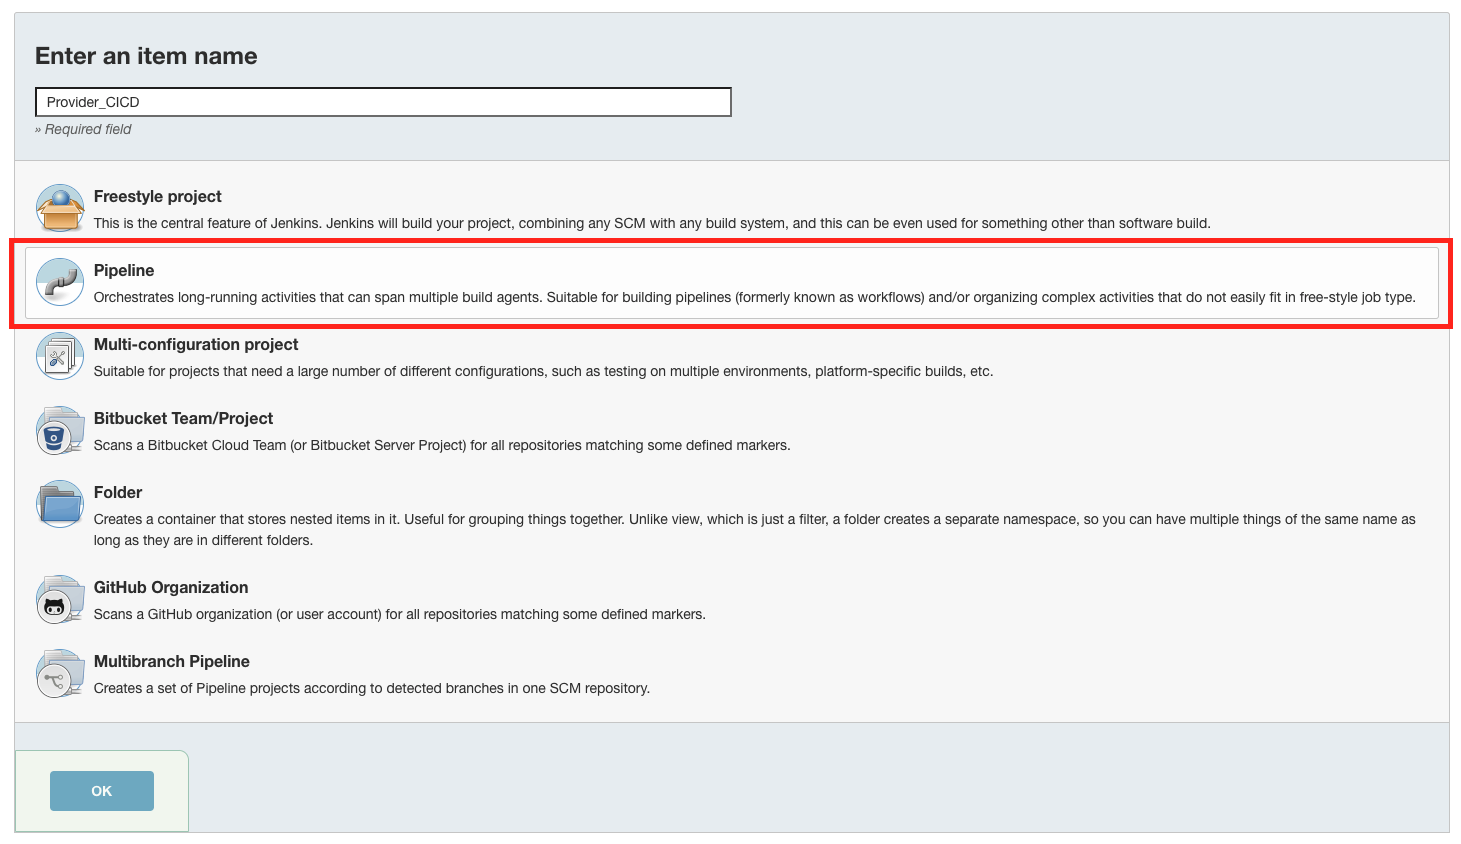
Jenkins URL로 접속하여 신규 Jenkins Pipeline Job을 생성합니다.
Pipeline Job에 Git 리파지터리 정보를 설정합니다.
4.2. Jenkins Pipeline Job 초기 Build
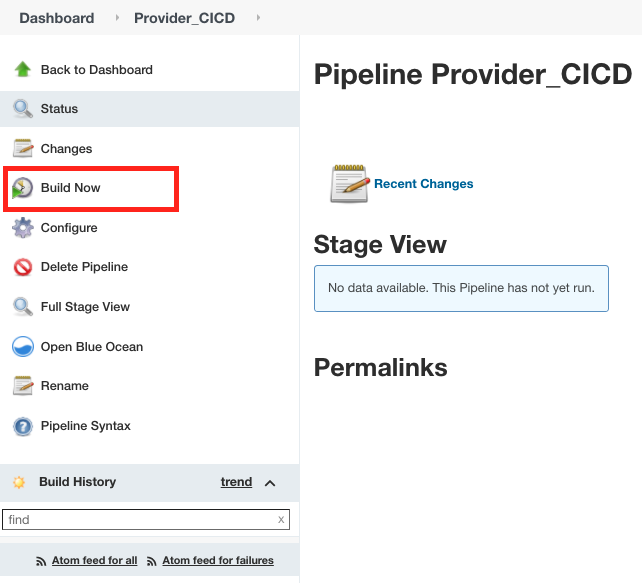
생성된 Pipeline Job을 첫 Build를 합니다.
첫 Build 후 BW Maven Plugin 라이브러리 에러(com.tibco.plugins:com.tibco.bw.palette.shared:jar를 참조 못함)를 확인합니다.
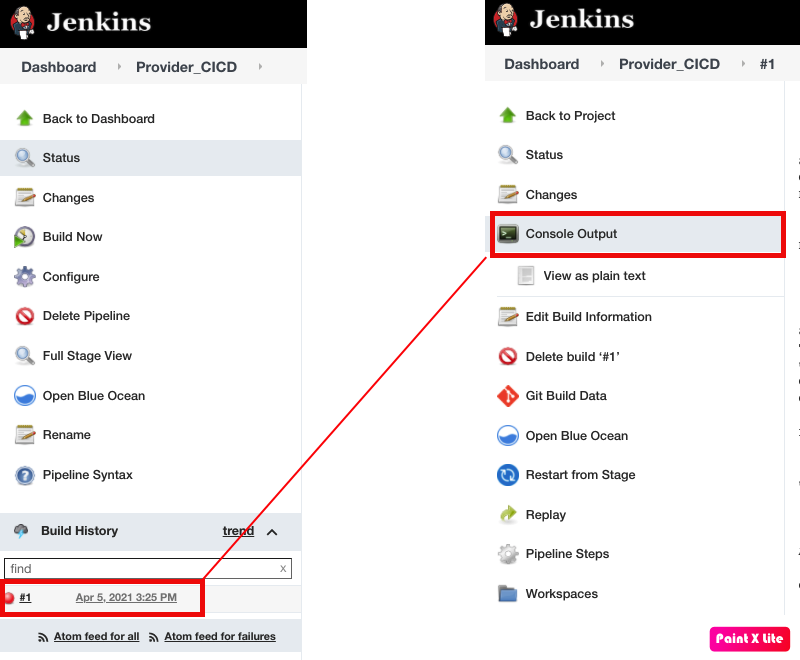

해당 에러는 Jenkins Pod에 BW Maven Plugin 설치가 되지 않아서 입니다. 아래 단계에서 해당 라이브러리를 Jenkins 컨테이너에 복사하여 줍니다.
4.3. Jenkins에 BW Maven Plugin 복사
내 로컬의 BW Maven Plugin을 Jenkins Pod에 복사하여 줍니다.
$ cd ~/.m2/repository/com/tibco/plugins/com.tibco.bw.palette.shared/6.1.100
$ tar -cvf bwplugin.tar *
// 로컬의 bwplugin을 Jenkins Pod로 복사
$ kubectl cp bwplugin.tar   jenkins-docker:/root/.m2/repository/com/tibco/plugins/com.tibco.bw.palette.shared/6.1.100

// Jenkins Pod에 접속하여 bwplugin을 압축해제
$ kubectl exec jenkins-docker /bin/bash
$ cd ~/.m2/repository/com/tibco/plugins/com.tibco.bw.palette.shared/6.1.100
$ tar -xvf bwplugin.tar
$ exit
4.4. Kubernetes config 파일 복사
Kubernetes에 엑세스 하기 위한 인증 정보가 담긴 Kubernetes config 파일을 Jenkins Pod에 복사하여 줍니다.
$ kubectl exec -it jenkins-docker mkdir /root/.kube
$ kubectl cp ~/.kube/config   jenkins-docker:/root/.kube/config
4.5. Jenkins Pipeline Job Build 및 결과 확인
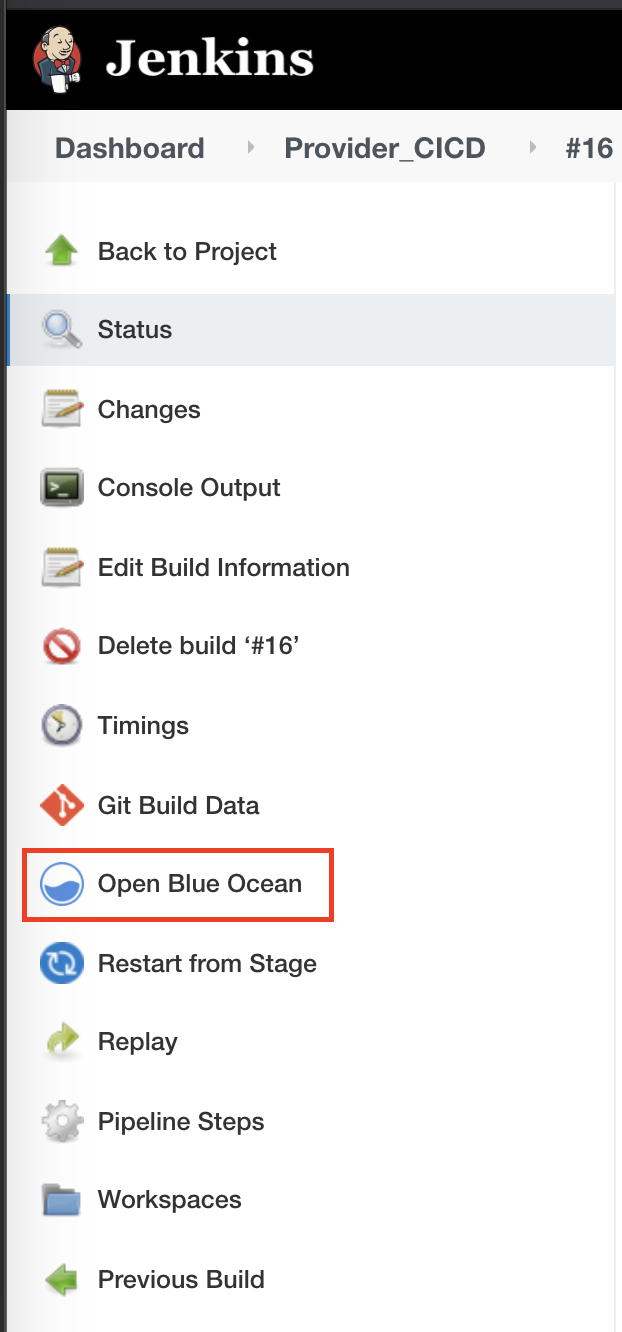
Provider_CICD Job을 Build합니다.

Blue Ocean을 열어 Job Build 결과를 확인 합니다.

5. Webhook 연결
Git 리파지터리와 Jenkins Job을 Webhook으로 연결하여 Git 리파지터리가 Commit을 트리거링 하여 Jenkins Job이 자동으로 빌드되도록 설정합니다.
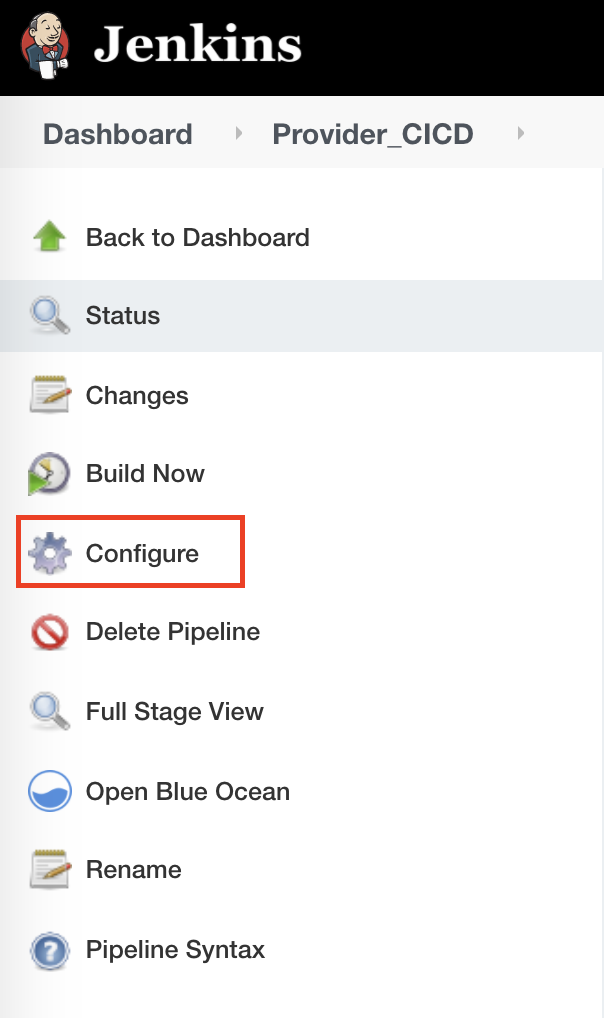
5.1. Jenkins Job의 Build Triggers를 Webhook으로 변경

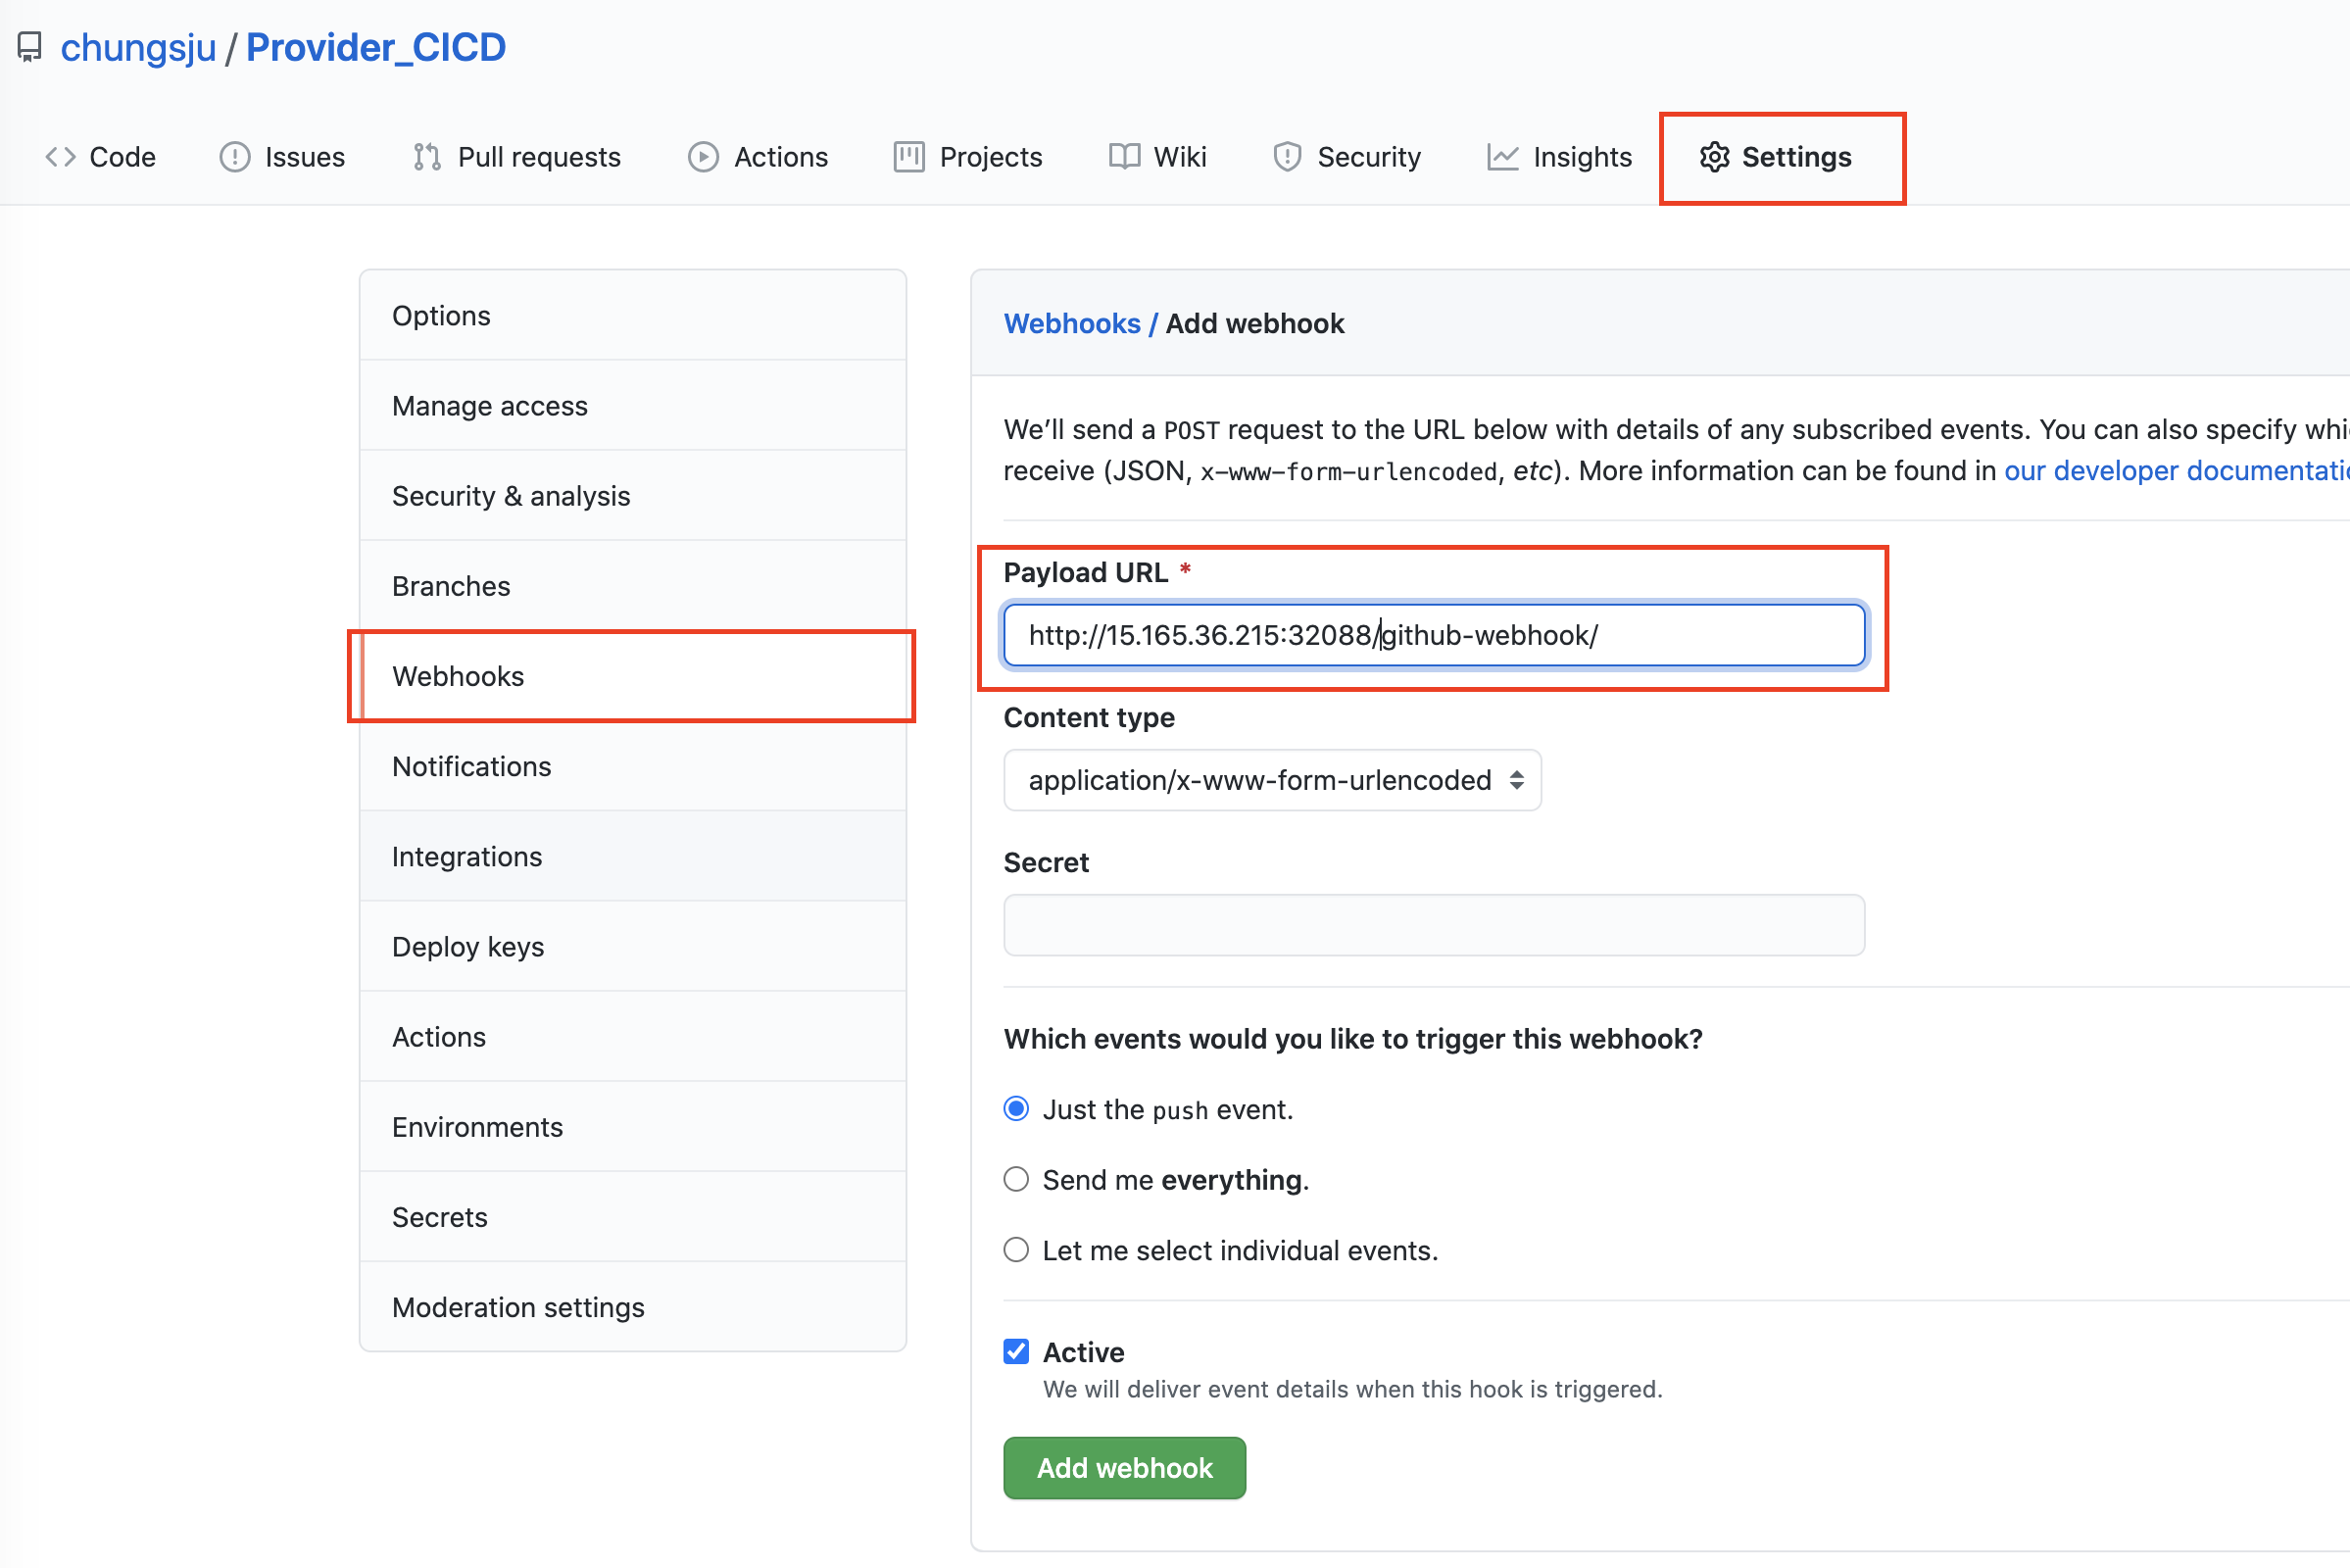
5.2. Git 리파지터리의 Webhook 설정
Git 리파지터리 -> Settings -> Webhooks -> Add webhook Webhook의 Payload URL : Jenkins호스트:포트/github-webhook/ 입력
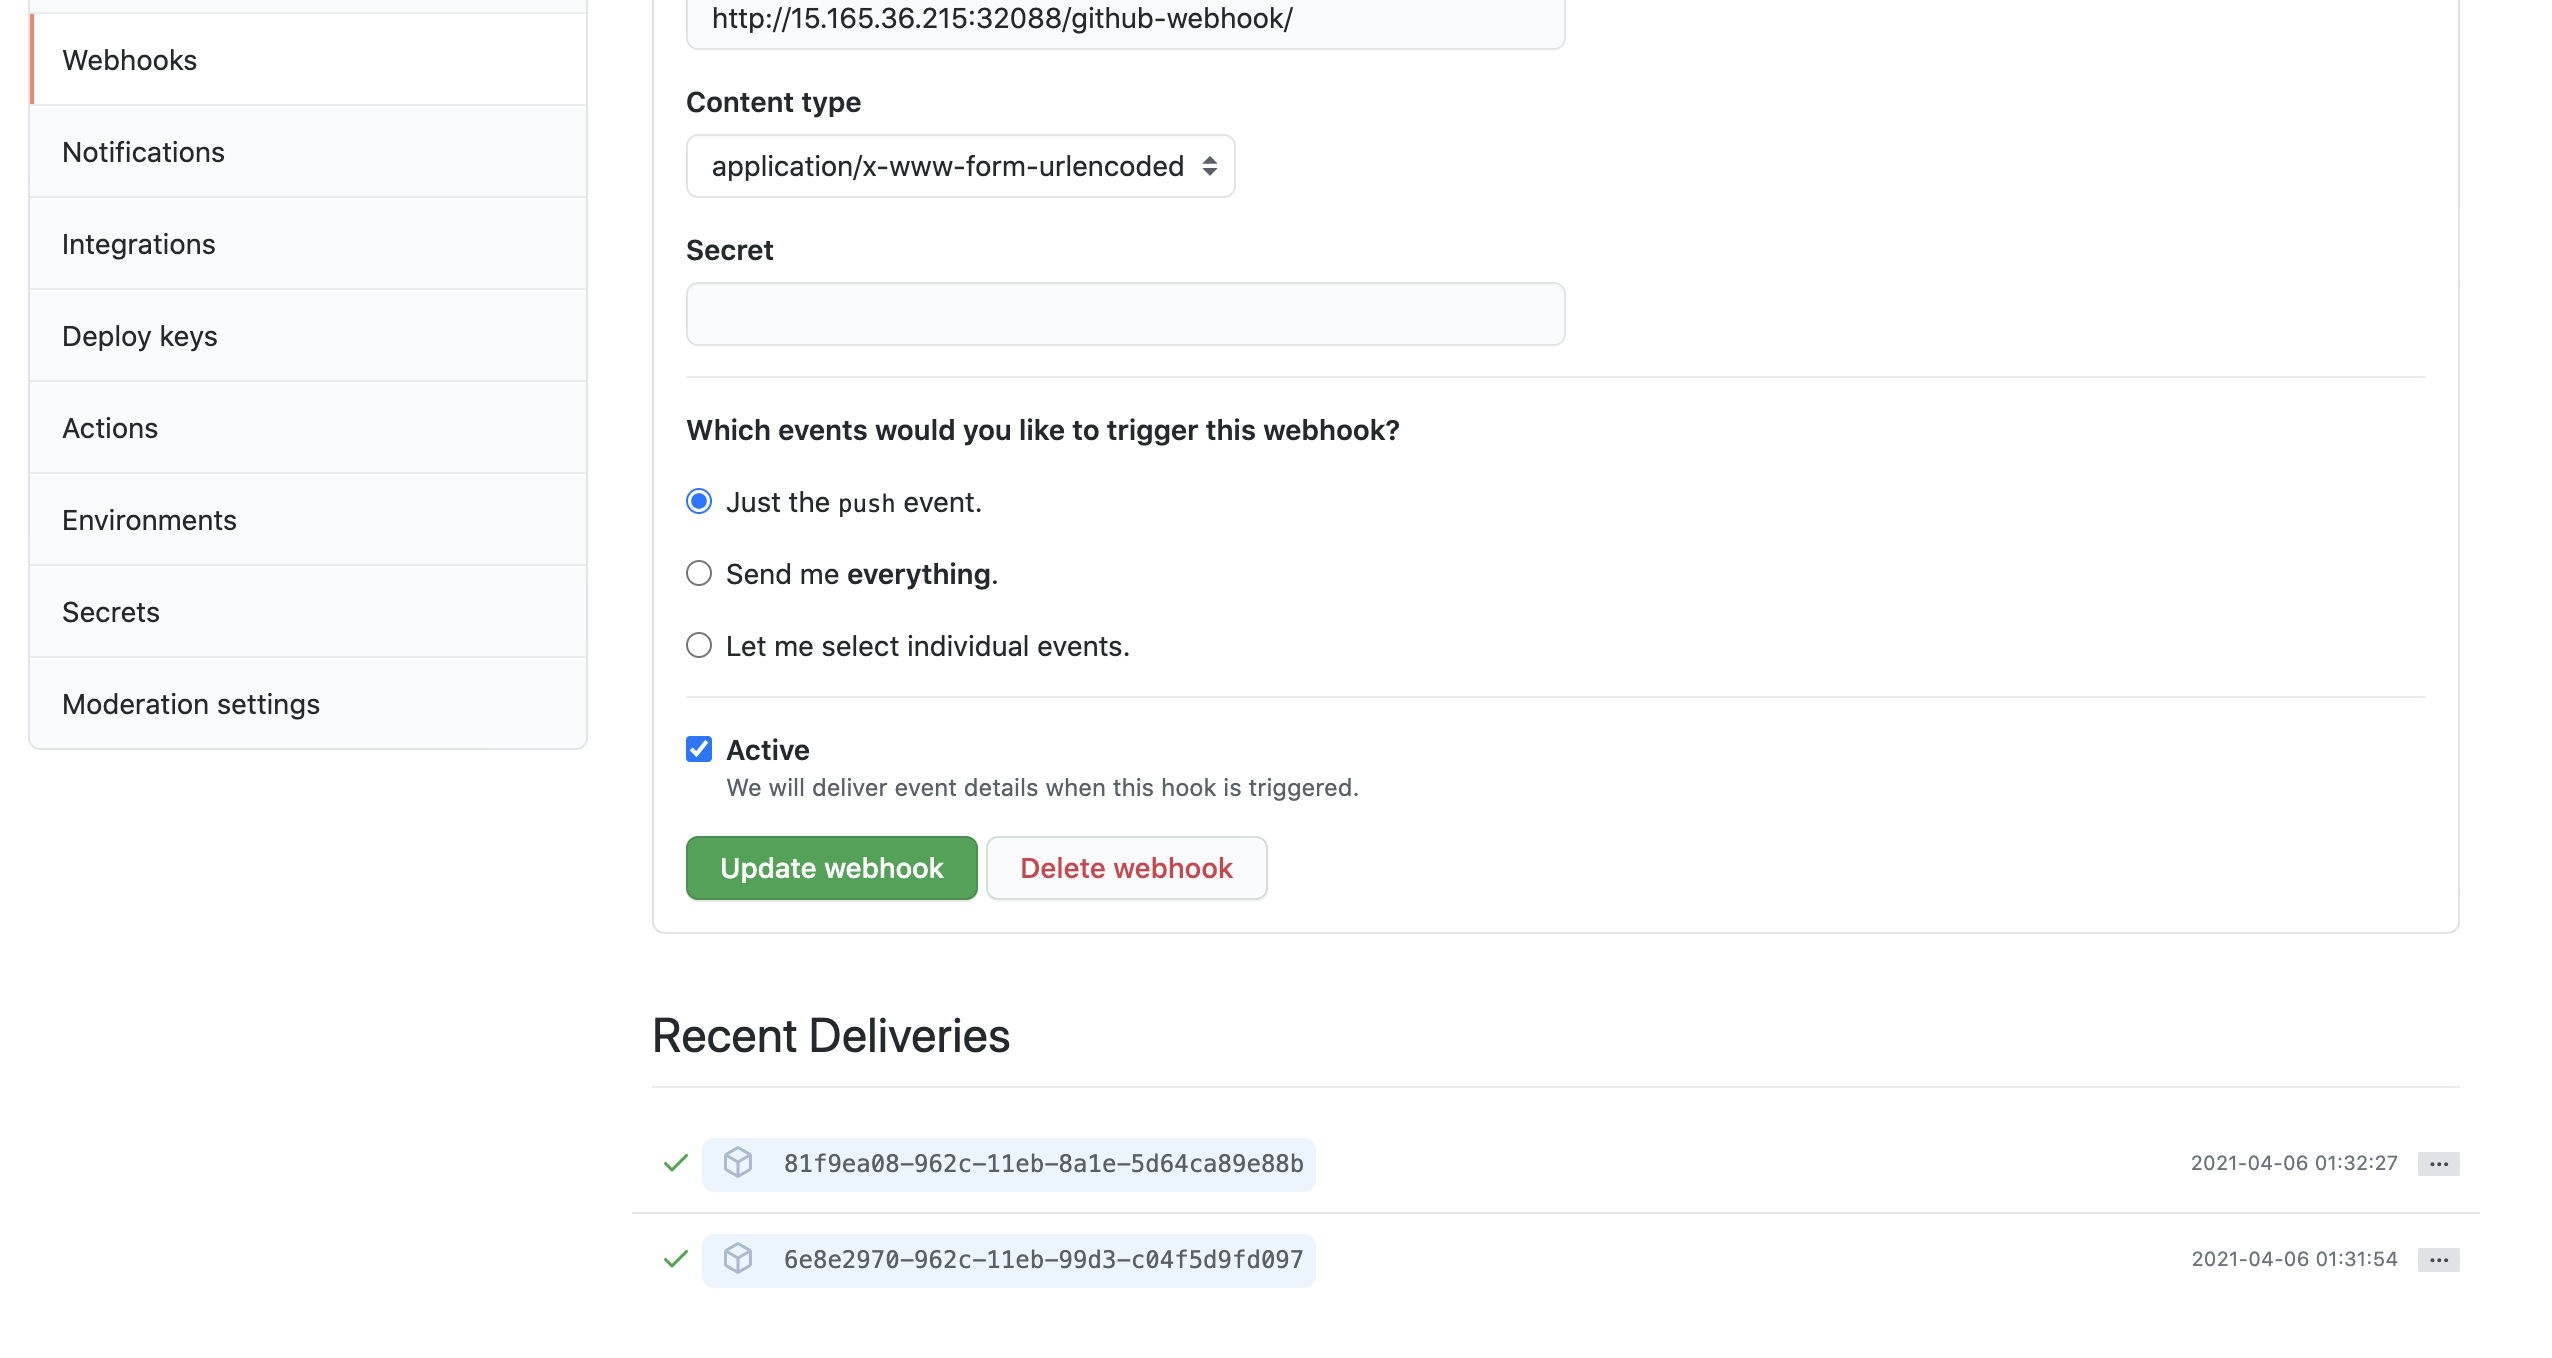
5.3. Application 변경 및 Commit 후 자동 Build 결과 확인
Application 변경 후 Commit/Push 후 Git 리파지터의 Webhook 호출 결과 확인
트리거링 된 Jenkins Job 자동 Build 결과 확인
